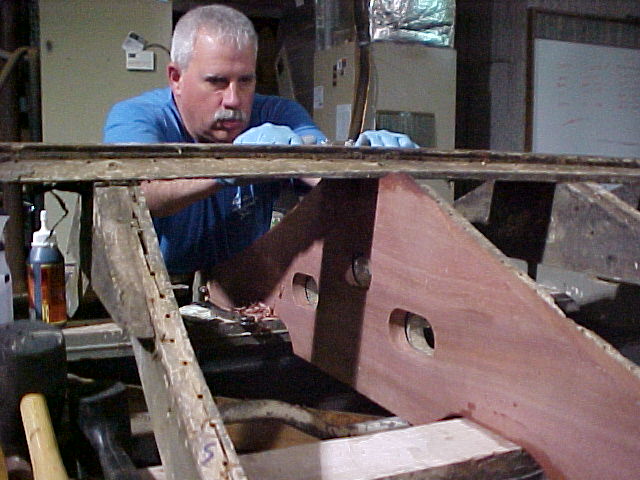
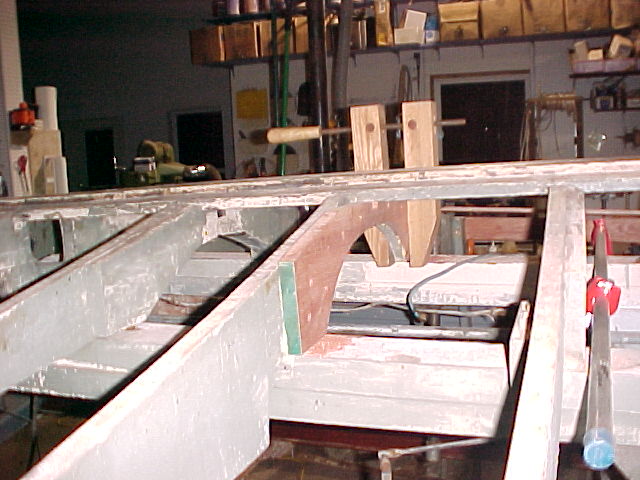
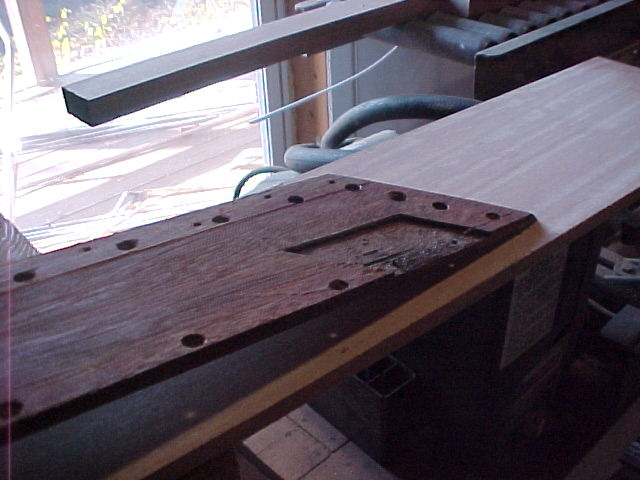
New frame to replace old rotted frame fastened in place and being spoke shaved fair with the adjoining frames and the proper bevel being cut to match curve of boat at this "station" . Because of the rot in the original frame we cut the new frame "proud" or larger and brought the surface fair by hand. An exact duplication was not possible due to the condition of the old frame being used as a pattern.
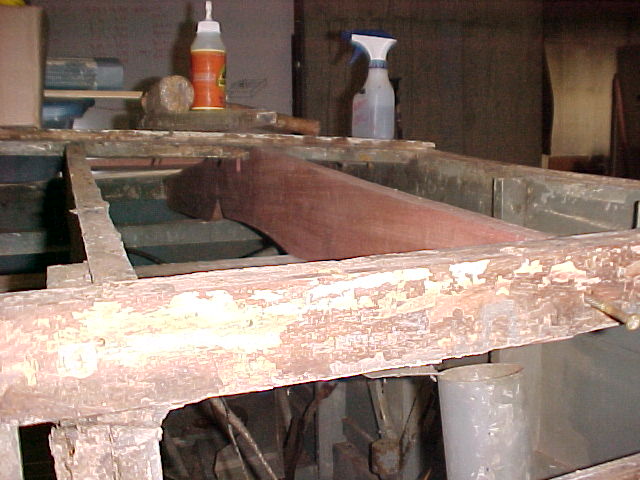
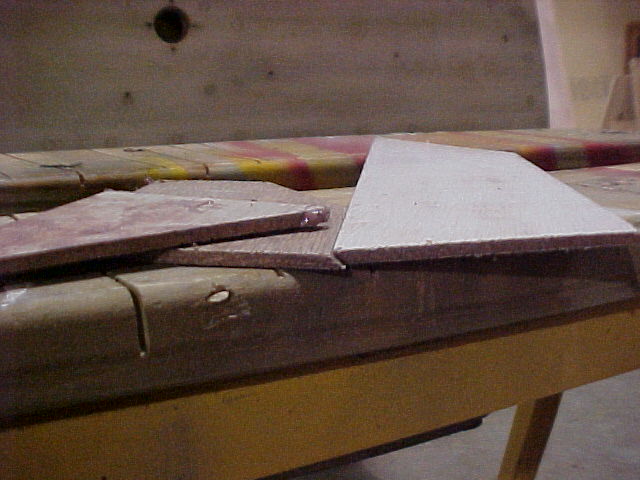
New bottom planks planed and ready to duplicate original planks. These planks started as 2" thick rough sawn material, was resawn to 5/8" thickness and planed to .047" With the 4mm inner plywood layer this will yield an overall bottom thickness of 5/8" just like the original diagonal and longitudinal planking combination did. The frame and chine materials were also fashioned from this rough stock. The chine is 1-1/8"x 2-1/2" and the frame material is 1" thick.
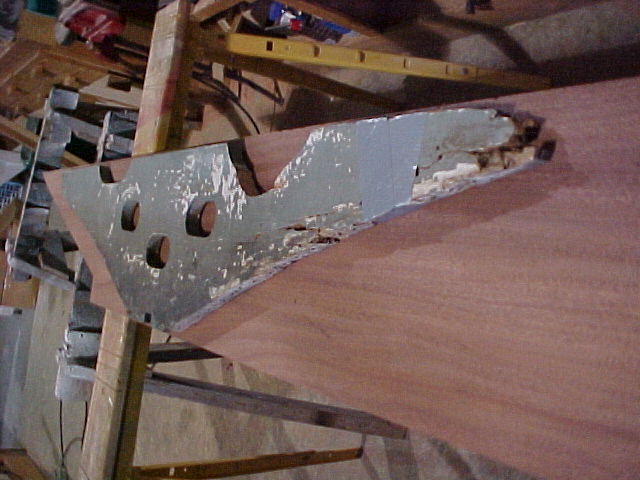
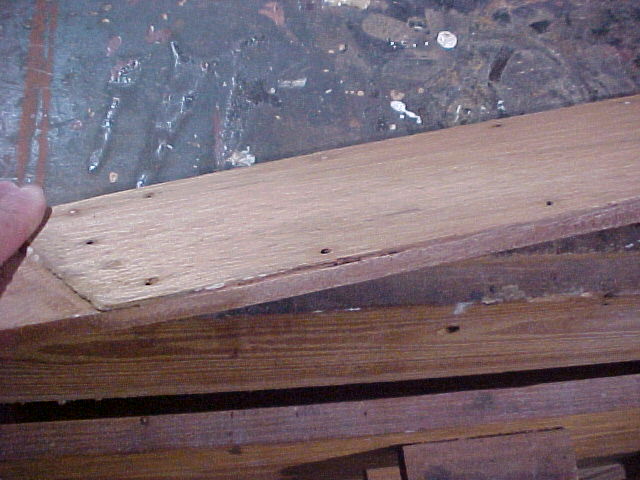
Old rotted frame setting on top of new frame material - ready for duplication. Note duct tape holding rotted section together as pattern.
/\
/\
/\
/\
/\
/\
/\
This week has been frame week thus far.
Beginning from the bow of the boat each rib being a station the work completed is as follows
Station 1 - nothing required
Station 2 - nothing required
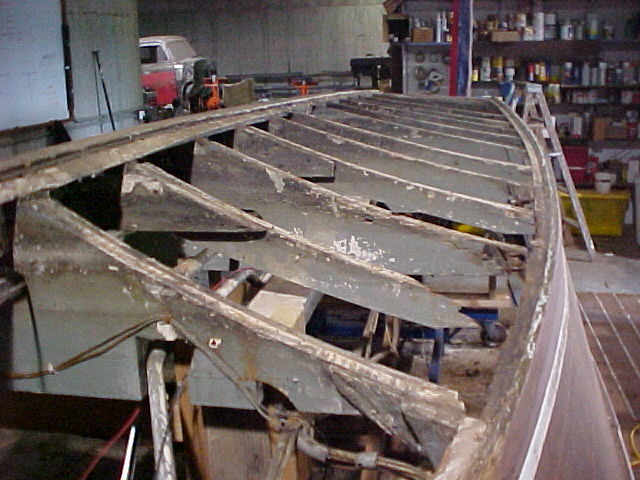
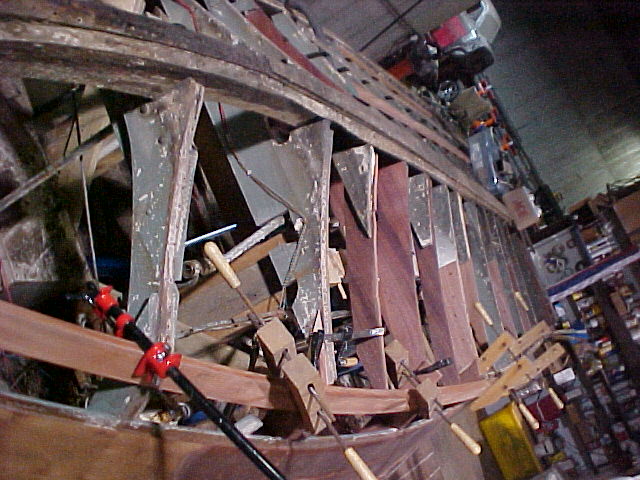
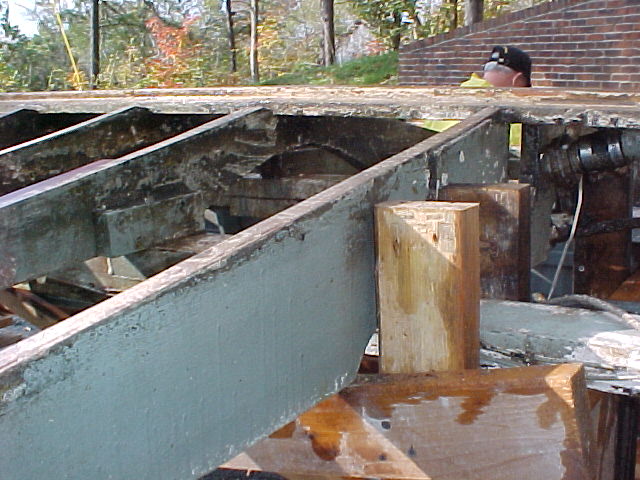
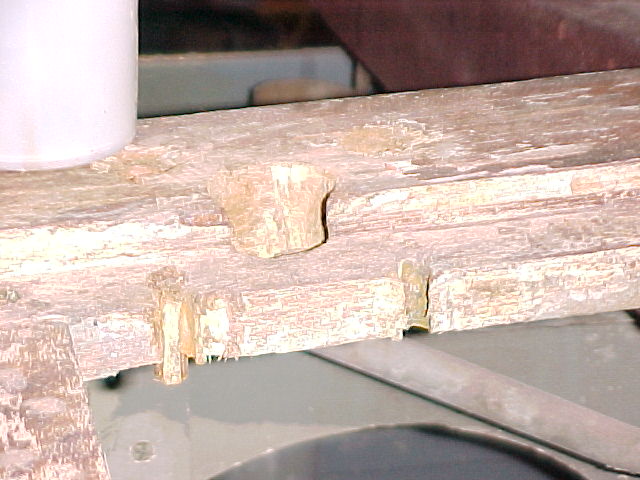
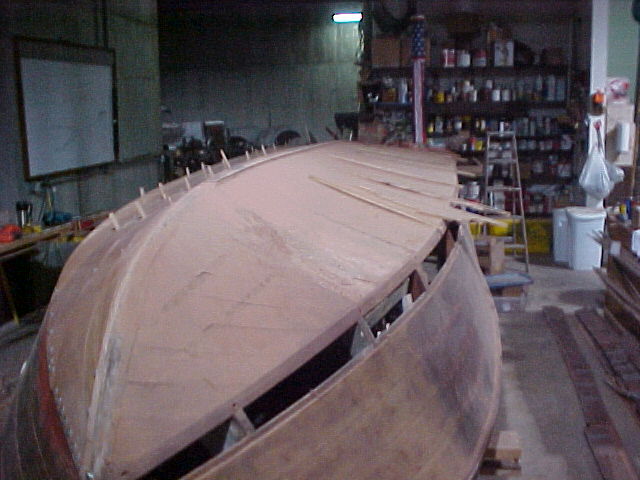
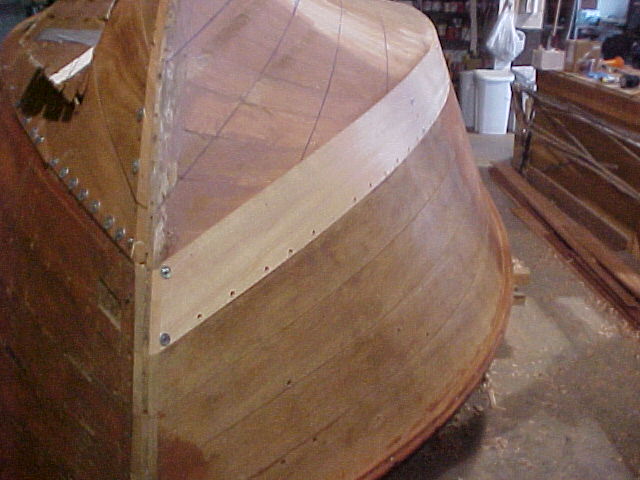
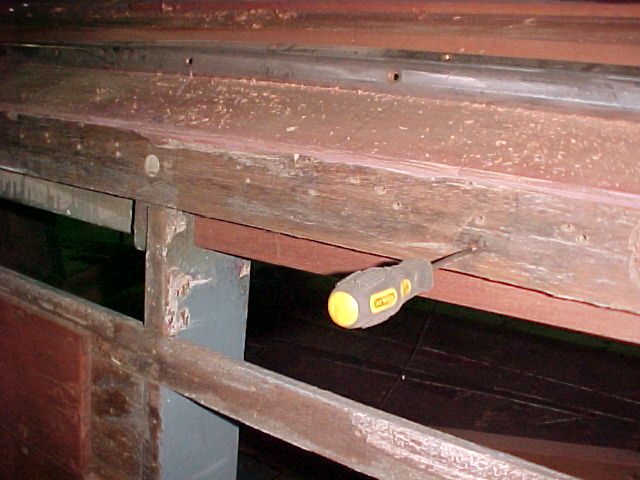
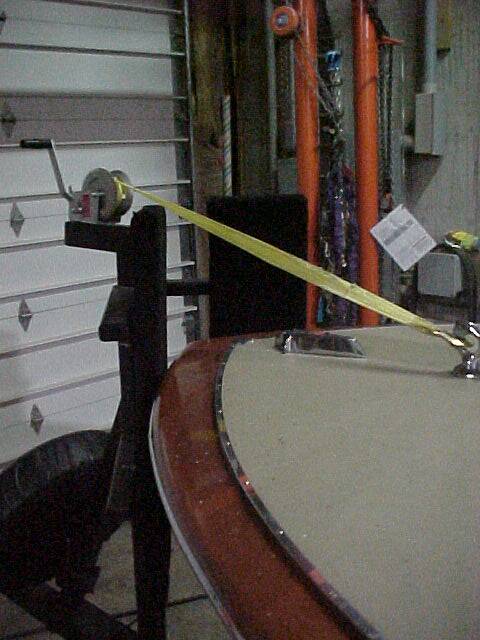
Station 3 - Sister frame on stake ( see yellow arrows) and photo below
Station 4 - Replaced Starboard 1/2 of frame ( every other frame is manufactured of two half frames)
Station 5 - Replaced entire frame ( this frame is not two piece as described above) This was expected
- Replaced stake ( this is the frame member that the side planks are fastened to)
Station 6 - Replaced Starboard 1/2 of frame
Station 7 - Sister framed existing frame (expected)
- Replaced Stake (eeeeh hoped it would be OK. but it wasn't)
Station 8 - Replaced Starboard 1/2 of frame ( unexpected )
Station 9 - Nothing required
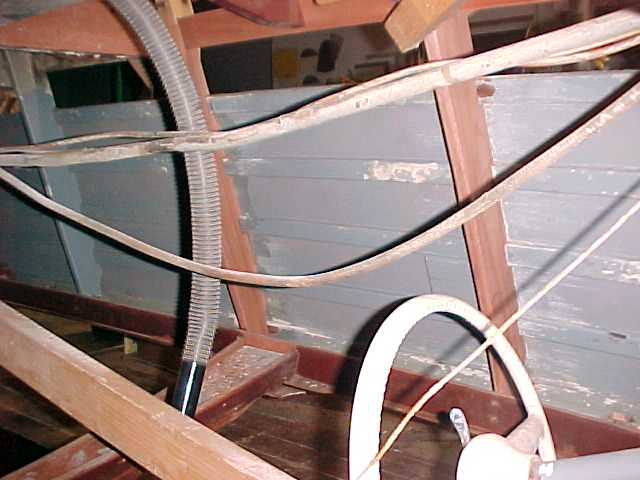
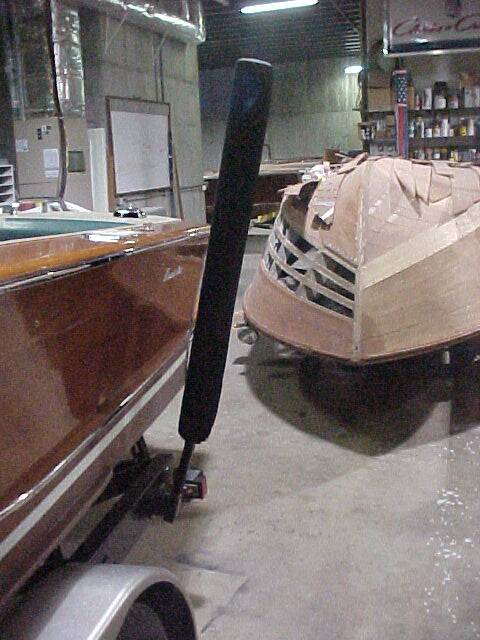
ALSO NOTE: NEW CHINE BLANK THAT HAS BEEN STEAMED
AND BENT IN TO PLACE.
Station 10 - Sister framed cracked frame ( unexpected )
Station 11 - Nothing required
Station 12 - Sister framed cracked frame ( unexpected )
Station 13 - Nothing required
Station 14 - Nothing required
Station 15- Replaced entire frame due to breakage.( unexpected )
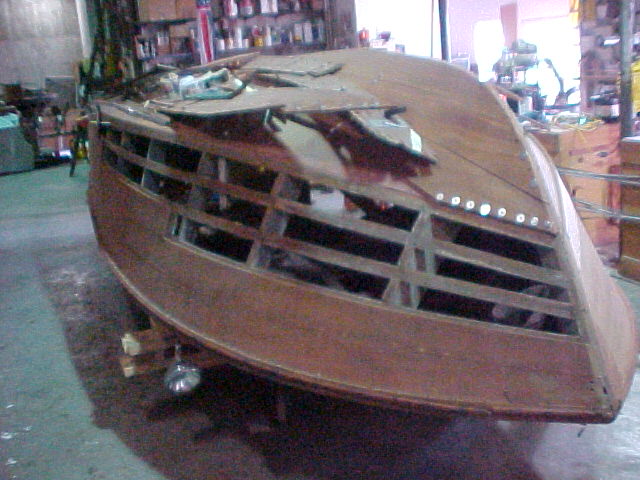
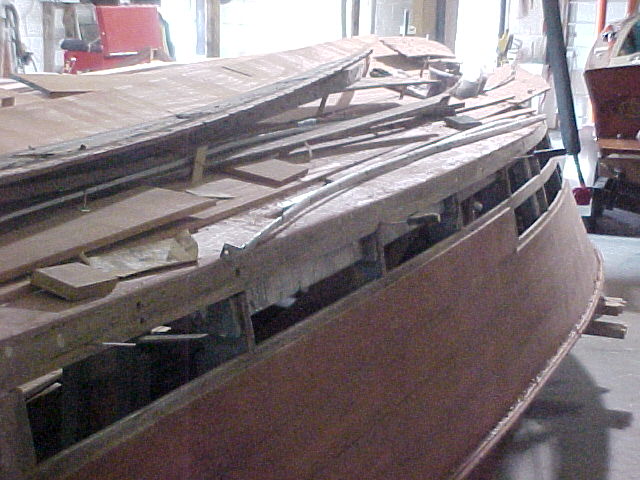
It appears that at some point in the life of the Chubby D the boat took a hard hit on the starboard side. The object probably hit or was hit somewhere between station 4 and 7. It probably damaged the chine between these frames as the chine had been replaced between stations 3 and 7. The chine was replaced with inferior products and methods. Those repairs made years before the current owner took possession rotted out and the rot migrated into the inner and outer bottom planking. It also seems that there was additional damage done that went undetected in frames at stations 8, 12, and 15. .
Four additional frames were cracked (frames 8, 10, 12, and 15 ) and were being held together by the bottom fasteners. Once the bottom and its fasteners were removed the cracks opened up and the connections to the chine became loose.
/\
Station 5 and 7 stakes
3
4
5
6
3
4
5
6
7
10
12
8
15
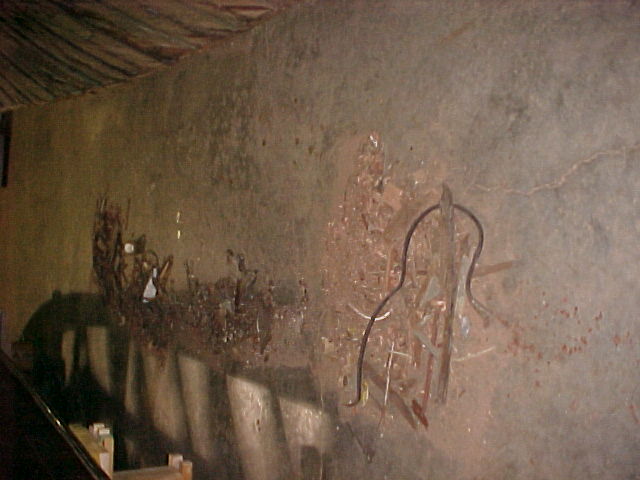
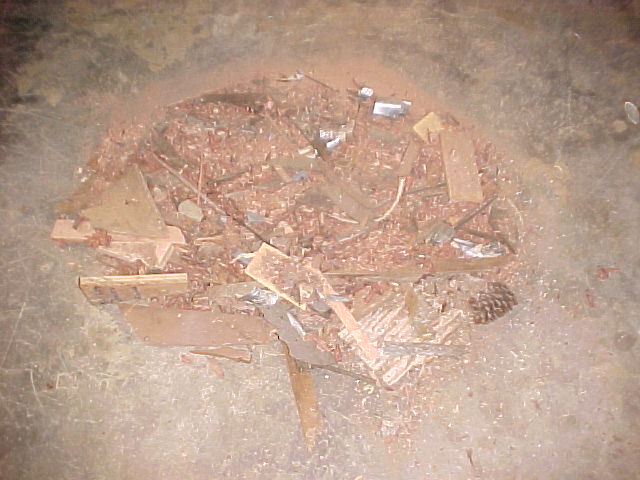
Piles of debris were removed from the inside of the inverted hull prior to a final cleaning before the final inspection
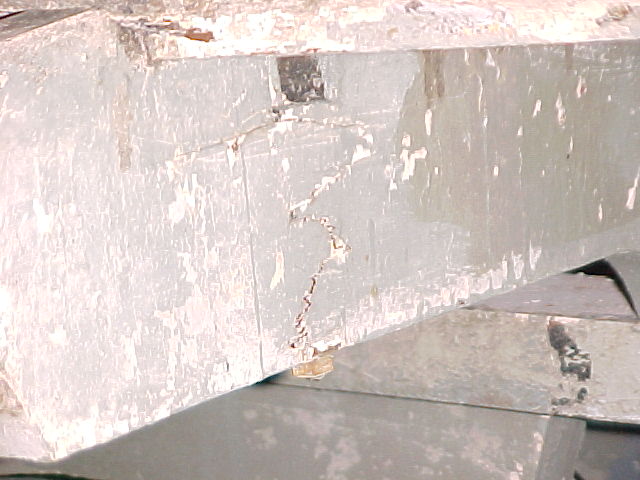
The boat frames were sprayed with Purple Power biodegradable degrease, the cleaner was brushed in and powerwashed with scalding hot water. Pictured above is a clean frame and dirty ones to the left of the clean one. This cleaning was a step to ensure the final inspection would reveal no other abnormalities before the bottom was installed. This step led to the discovery of 2 more cracked frames, additional rot in the chine and an additional rotted 1/2 frame. All components infected with rot were replaced and the crackedframes were sistered.
Frame 14 cracked as revealed by cleaningFrame 14 sistered
Frame 11 sistered
Frame 4 Port 1/2 replaced
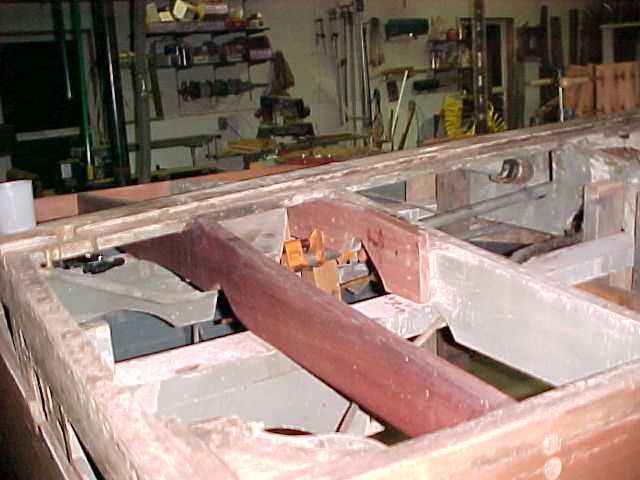
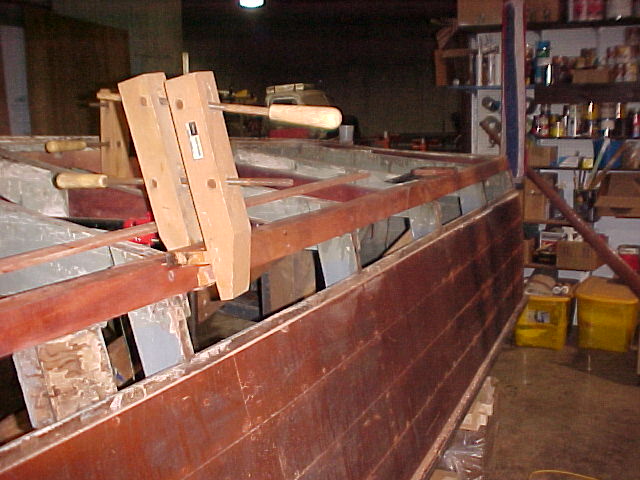
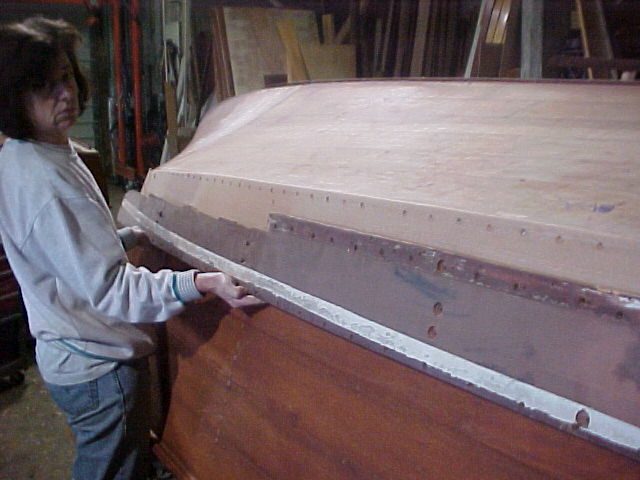
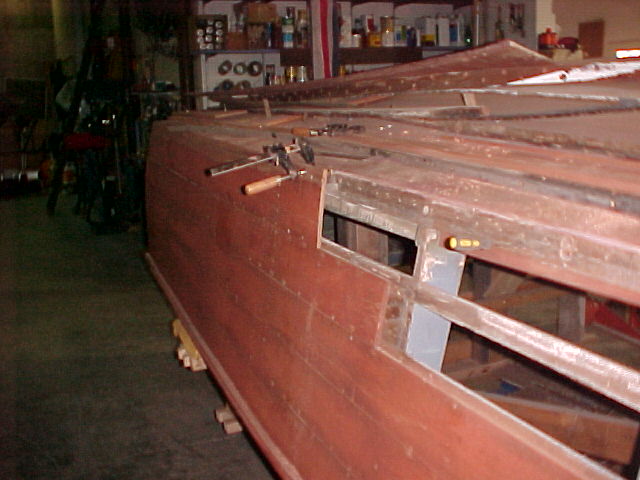
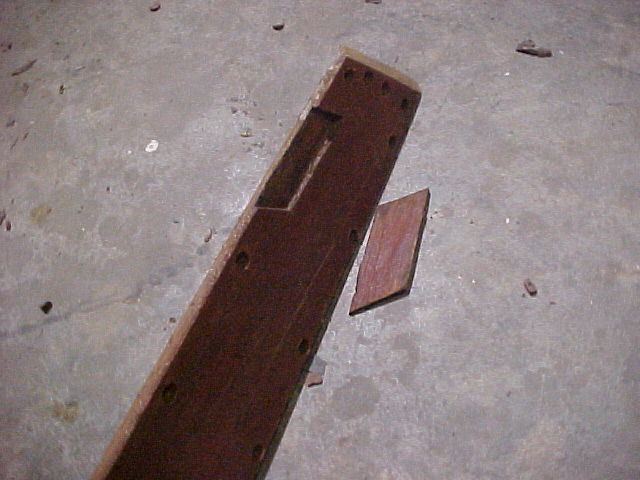
Starboard chine replacement shown in pictures above. Note the rabbet that has been cut to accept the marine plywood at the forward end of the chine. Note that this chine starts as a rough cut 2" mahogany plank. It is resawn and planed to the 2-1/2" X 1-1/8" rectangular chine blank that is steam bent and formed in place, then planed to match the slope of the frames forming the shape of the bottom..... a wood sculpture!!! The entire Chine on the starboard side was replaced. The Port chine did not exhibit any rot.
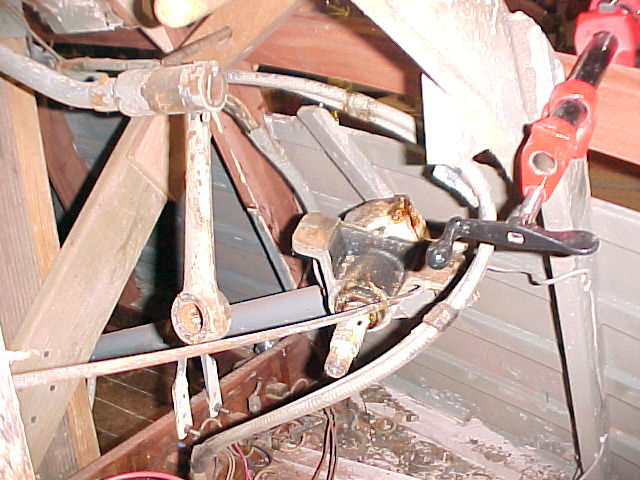
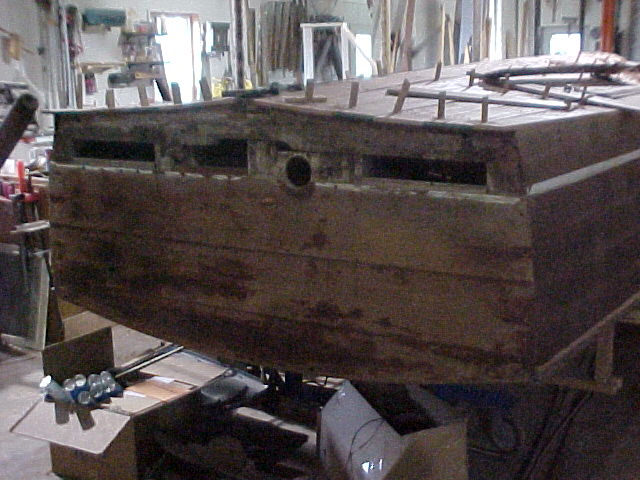
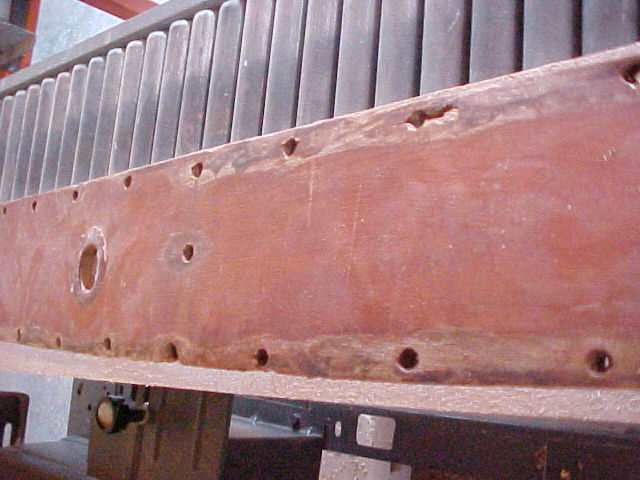
Note where the rudder stuffing box (seal) mounts to the keel. The large hole in the center is where the shaft of the rudder goes through the keel. The four holes surrounding the center hole are used to bolt the flange of the stuffing box to the keel. The bolt holes in the foreground of the picture are not actually holding much, in fact the one of the bolts had completely compressed and broken through the original hull planking. I am sure there was a major leak at the flange. Stay tuned to see how we correct this issue and make the boat better than when it came out of the factory in 1954!
October 27th Update
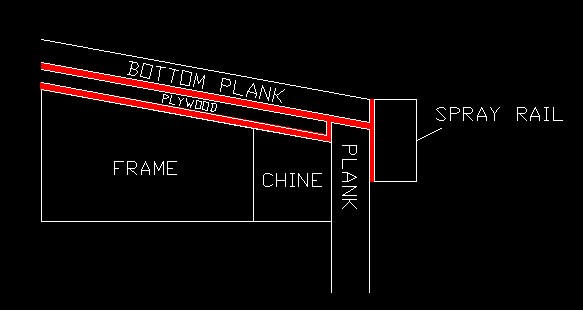
We have been asked if the bottommost planks on the side of the boat have to be soaked with a no-soak bottom. This diagram should help us provide a clear answer to that question. A no-soak bottom uses 4mm marine plywood and a rubber-like glue, which we like to call 52 million, to achieve its perfect seal. In the diagram to the left, the glue is represented as a red layer. You'll notice that there is a layer of glue underneath the plywood layer and also between the plywood layer and the exterior plank. Before the mahogany bottom planks are attached a layer of glue is applied underneath them as well. Lastly, the spray rail is seated on a layer of glue when it is attached. This leaves no unsealed joint through which water could penetrate the bottom of the boat with no soaking required!
The top joint of the side plank is above the waterline,so again no concern about leaking.
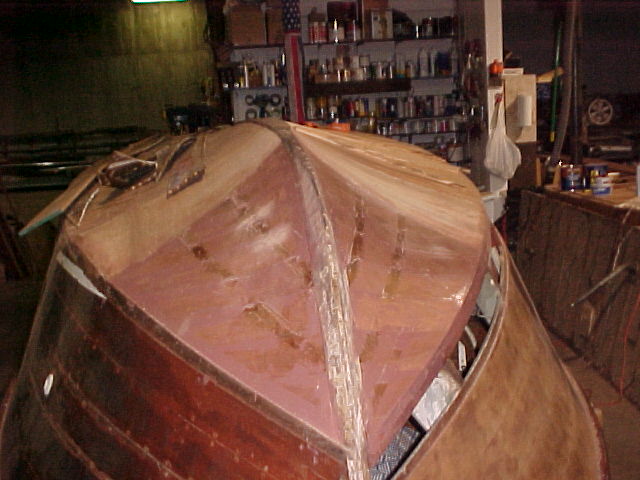
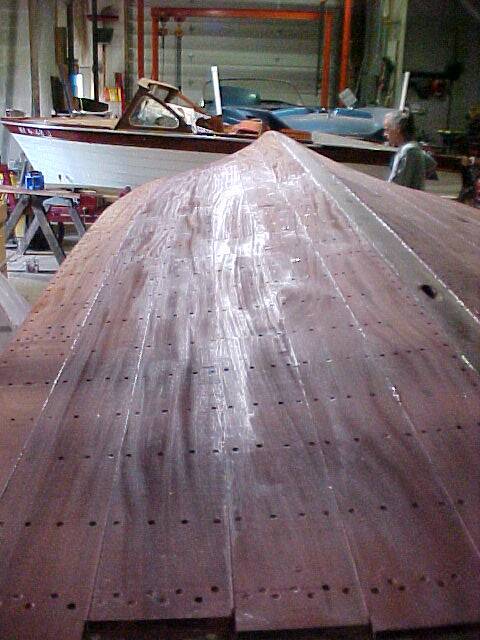
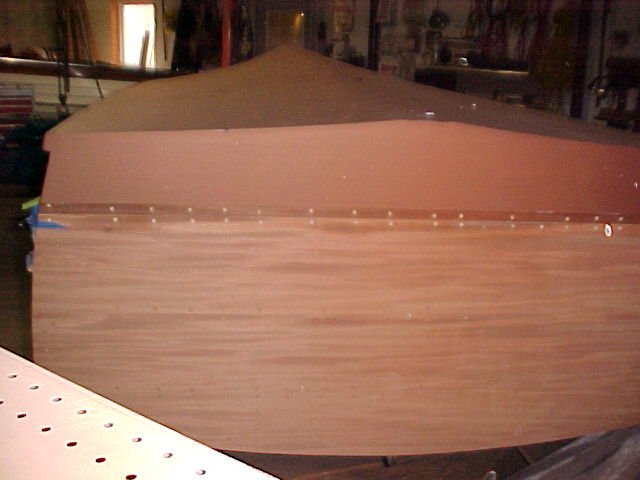
All RIGHT! - The good guys are winning. The bottom is entirely covered with the inner layer of 4mm BS1088 Marine plywood. With the exception of the two planks missing right above the chine (or below when the boat is on its back) this boat will float and not leak. An additional layer of new African Mahogany planks will be installed for an additional level of water tightness but mainly for protection of the boat from damage and extra structural integrity. The new planks will be bedded in a layer of 3M 5200 adhesive sealant so as a result there will actually be 3 waterproof layers. See copyclip from AUTO CAD drawing above.
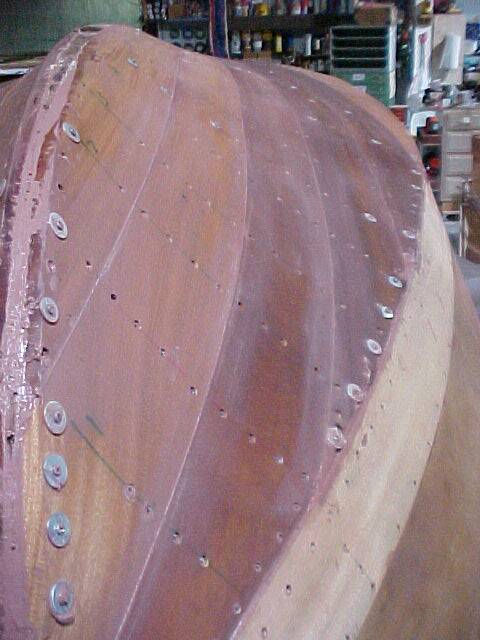
Note the diagonal planking done with the plywood on the two forward frames. This has to be done at the front of the boat as the plywood in sheet form will not fit the double inverse curves of these frames. Unlike the original diagonal planking, these diagonals are sealed with 3M 5200 ( 52 million! as will like to call it) Take al look below - left to see a Woodies exclusive!
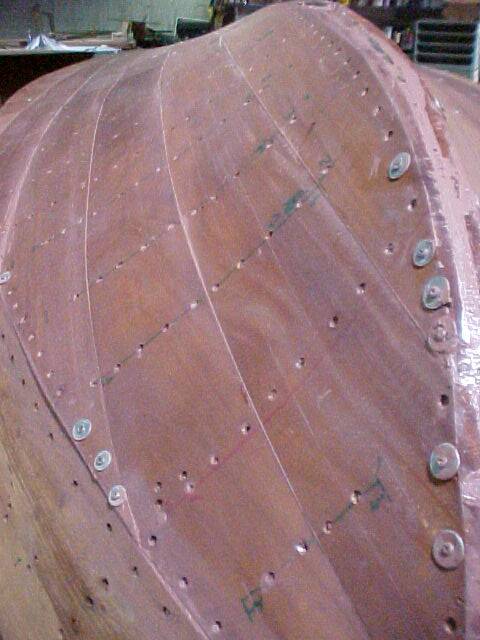
All plywood is held in place to the frames with 3M 5200. Stainless steel staples were used to hold the plywood in place while the 5200 set for 2 days (or more) to cure before the boat was disturbed.
WOODIES EXCLUSIVE!
Note the 45 degree angle bevel on the plywood used for the diagonal planking. This gives the 3M 52 Million more surface area to adhere to. It also gives greater interlocking of the planks for the best result in following the contours of the area covered
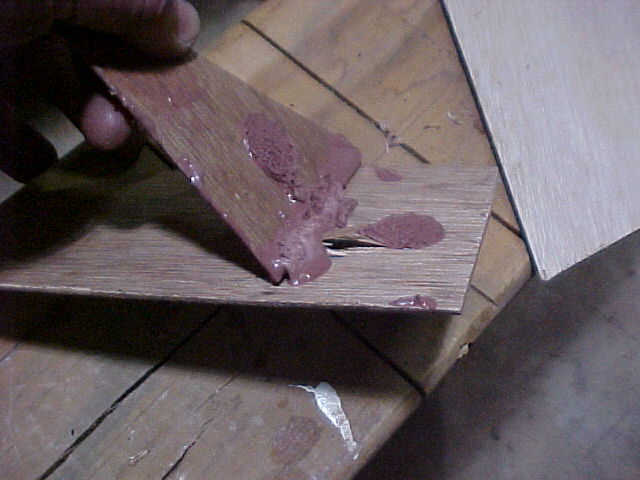
3M 5200 is very elastic and has a very tenacious hold on whatever it is applied to. Pictured here is two scraps of the diagonal planking that were glued together with 5200. I pulled the joint apart to demonstrate the properties of the 5200. After curing the adhesive sealant is very elastic and as you can see the wood fiber of the plywood failed in this joint and not the 5200. This will allow the boat to flex as it did when it was originally manufactured yet not develop the leaks it did. I have been running my 1960 Capri HARD for 12 years on a 5200 bottom with no issues!
November 10th Update
Auto cad drawing of cross section of inverted boat showing relationship of planking, inner and outer and side , frames, chine, and placement of 3M 5200
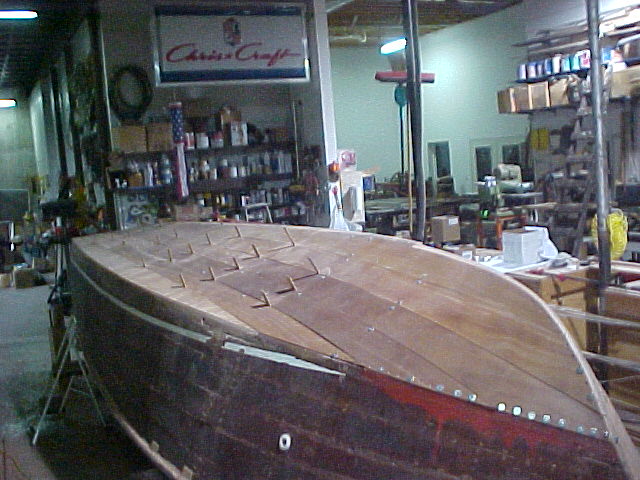
Since the last update, planks have been trial fit on the Port side of the boat (port when the boat is upright).
After the planks on the starboard side have been trial fit new intermediate ribs (not pictured ) will be installed on the inside of the hull to replace the old ones.
Next all planks will be removed and then replaced one at a time and bed in 3M 5200 adhesive caulking and screwed down with approximately 2500 screws. This process will take one long day and when complete the hull will be kept wet for approximately one week while the adhesive cures. ( that will be the week of Feb 12).
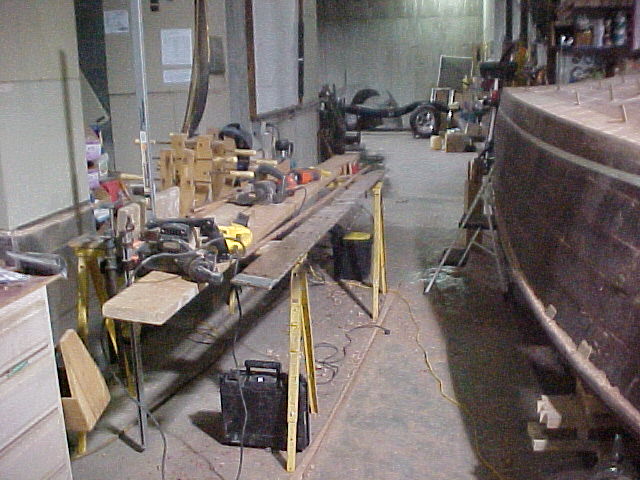
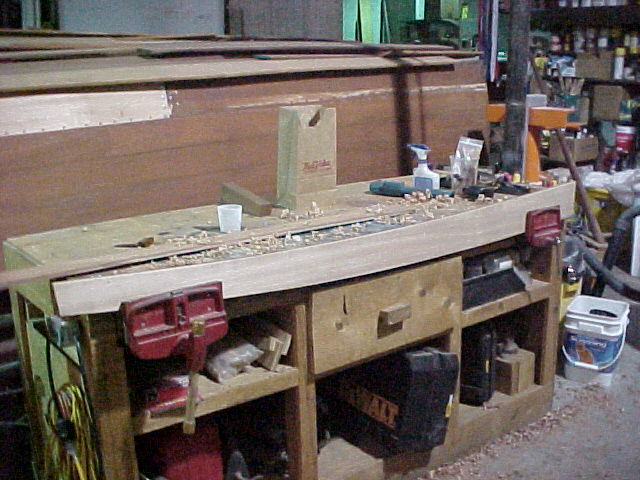
World Class Manufacturing Principles in practice. World Class Manufacturing Principles dictate that wasted motion, effort and hence time are to be eliminated whenever possible. We as customers are not willing to pay for wasted time.....and so it goes in our shop! Note the plank duplication station is portable so that it can be literally no more than one step away from where the planks are to be applied to the boat. This also reduces fatigue for this old guy - keeps the mind sharp, frustration down, and productivity up!
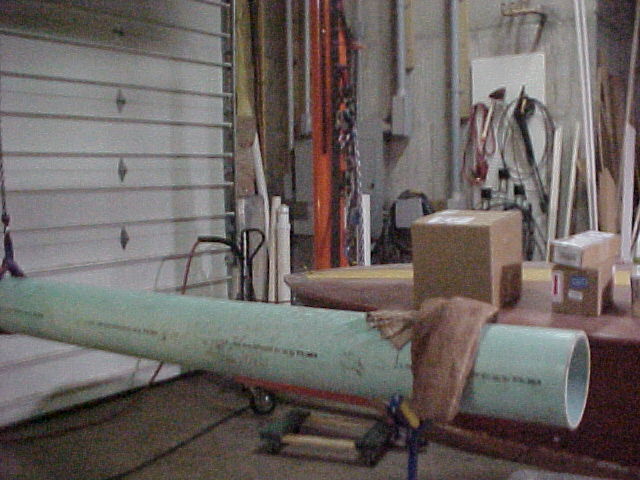
The white arrow is on top of the 12' long steam chamber and pointing to the steam generator. The generator converts about 100 pounds of water to steam every hour. Entire planks are placed in the chamber for a specified period that depends on their thickness and made flexible for bending to the form of the frames of the boat.
/\
/\
The white arrow points to a new intermediate frame that will be placed on the underside (inside) of the boat to fasten the planks to between structural frames. This ensures a good bond of adhesive between the inner and outer hull materials.
Here are the old planks laid out on the new materials in preparation for duplication and trial fitting on the Starboard side of the hull.
/\
/\
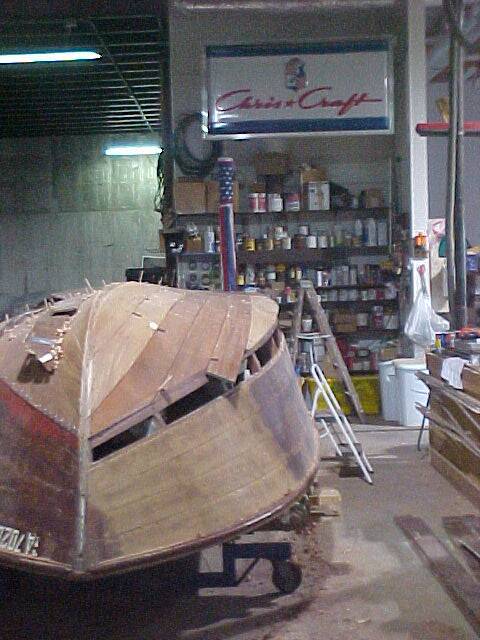
Trial fitting of planks is completed on both Port and Starboard. As a last step before the planks are permanently bedded in place the transom plank and plank just above the chine (below the chine in this inverted position ) will have to be replaced. Note: white arrows on the photos. Replacing these planks now after the bottom planks are removed in preparation for bedding with #M 5200 will minimize the time required to fabricate and install these planks. A strip and refinish "kit" has been placed on order. It contains all the stripper, sandpaper, stain, sealer, varnish, paint filters, brushes, rollers, tack cloths, thinners, deck seam caulk, boot stripe and deck seam paint, nitrile gloves, etc. for the stripping and refinishing of the boat.
February 12th Update
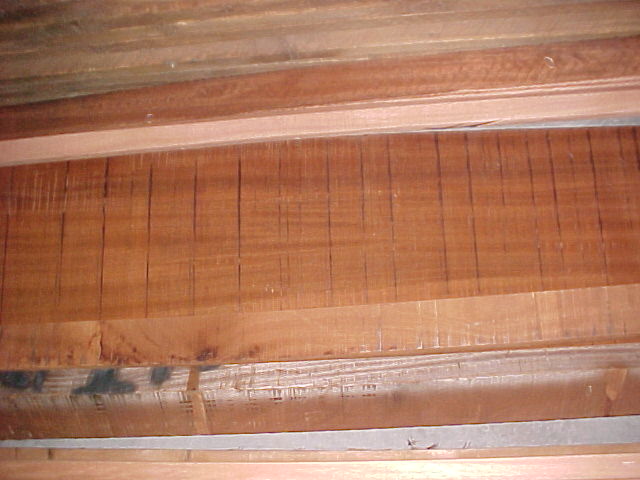
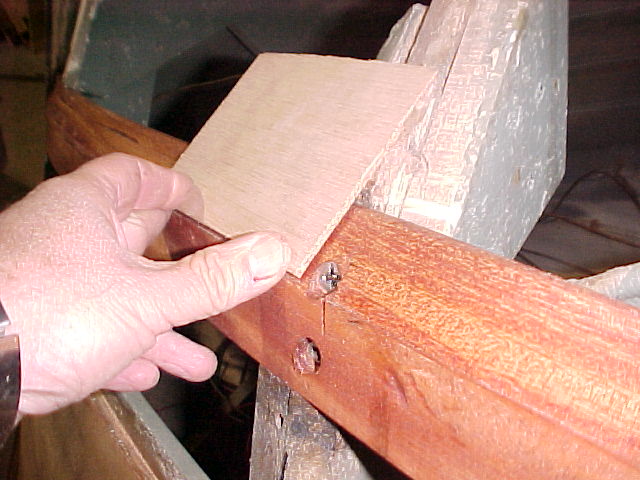
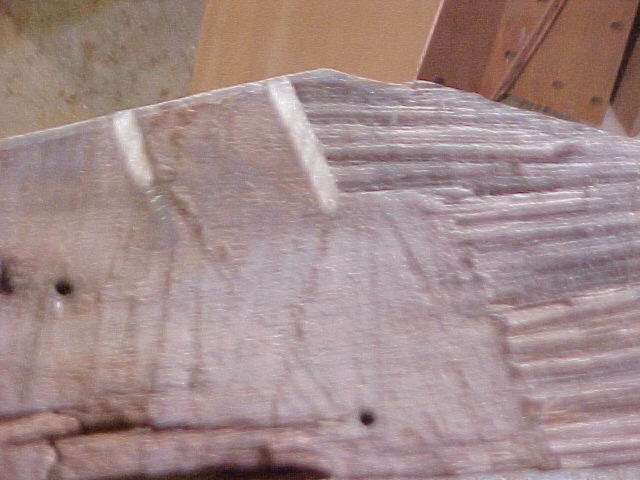
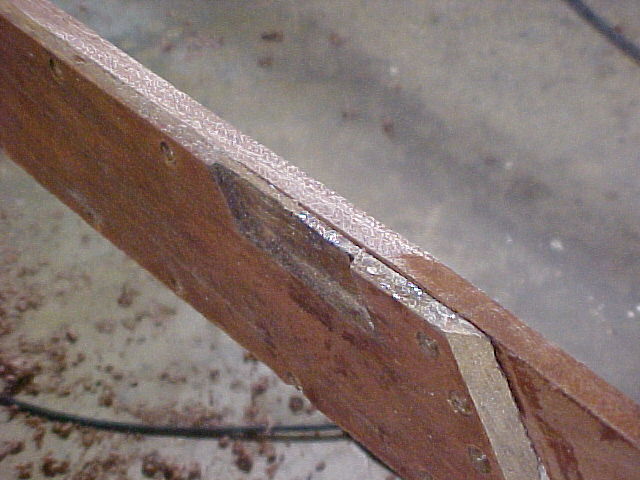
Just in case you might wonder why we plug the fastener holes in the ribs I took a rib that had been replaced due to rot and plugged fastener holes then sliced the rib in two longwise to show the cross section of the plugged holes. If these were not plugged, water would get into these compartments and accelerated rot will occur in these holes. The rot will eventually work its way to the surface of the wood, but the rib will have lost its integrity long before the rot reaches the surface..
March 18th Update!!
/\
The forward two planks in the bottom "strake" (row of planks) on the starboard side have been replaced. Note the condition of the old planks. They were rotted out where the attached to the chine due to inferior materials and methods being used to make a chine repair probably 20 years before this restoration.
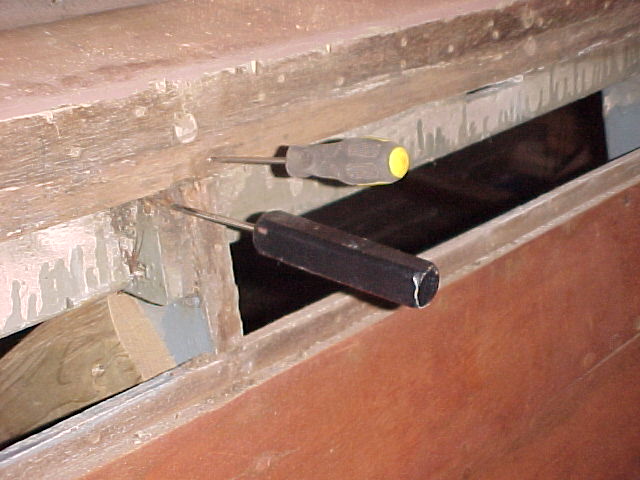
The Hull sides have been stripped of bottom paint, boot stripe paint, and varnish. The stripping process revealed another defect that will need to be dealt with.
/\
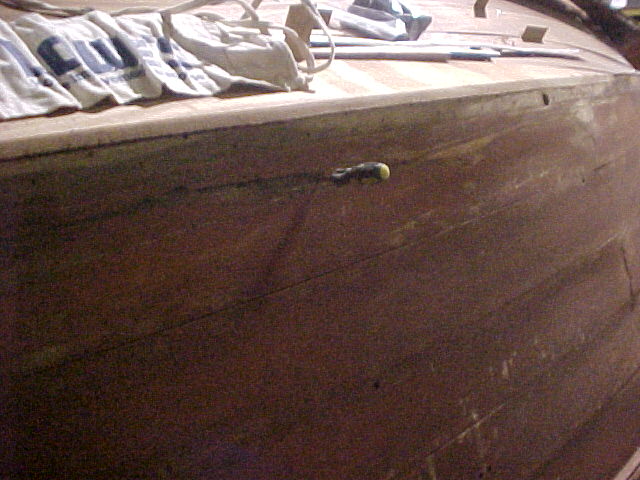
Above the white arrow on this picture you can see the ice pick that has penetrated the side plank. The rot had been filled with some type of filler material that the stripper apparently removed. We did not find this the day we stripped it - we actually found it today when measuring to scribe the boot stripe borders in the new wood on the opposite side. This plank should be partially replaced as the rot is about 1/2 way through the thickness of the plank where the rot is visible on the surface. This one spot is the only place the pick went entirely through the hull... but I could see daylight through a pin hole before I put the pick in.
The Strip & Refinish Kit has everything required to strip old varnish, sand, stain, seal and varnish.
October 26th 2007 Update!!
Planks removed from 3 strakes (row) The upper 2 photos show where a patch had been made to repair damage done when the boat was loaded off center and hit the bow stop on the trailer.
Our repair will be to laminate a plank to the back of each of the originals, then run the assembly through the planer to remove the surface of the original plank down to just below the damage. Then the new material will be planed off the back to get us to the original thickness and the plank will be reinstalled with the original grain showing. This way a perfect match of grain and color will result when the boat is refinished! - because the original wood will be the surface showing!
The plank in the picture to the right just plain has too much rot on the edges to use - so it will be replaced.
Where the plank was removed from the chine due to rot in the plank - there was a very small amount of rot found in the chine. This will be treated by drilling out the rot - which is just on the surface, treating with Smiths CPES and then filling with a new mahogany disk, and surfacing it fair. This Chine is going on 44 years old and is in great condition!
Curiously, one would have expected to find this rot adjacent to where the plank had exhibited rot, but not so....
As a result we will be removing the rest of the strake to ensure there is no rot in the portion of the chine not yet uncovered.
This will add about 2 hours of labor that "hopefully" is a waste of time - that is 'hopefully" we will not find any rot what so ever in the area not yet uncovered... but since we found a little shown where the ice pick is we need to check the rest of the chine.
NOTE: added 11/8 - this was not a waste of time... two more small areas were found on the chine that can be removed, plugged and will extend the life of the chine - probably beyond our lifetimes! This was a good move! Maybe added a three hours labor is all!
This is a prime example of how even after a meticulous cleaning and inspection of the chine / frames from the inside of the boat, some issues just might remain hidden.
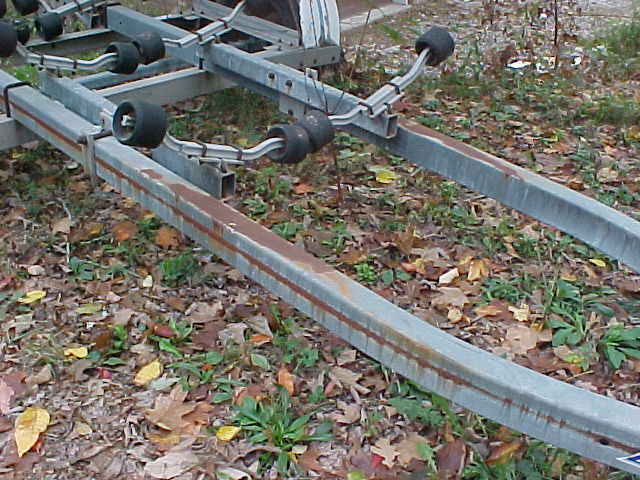
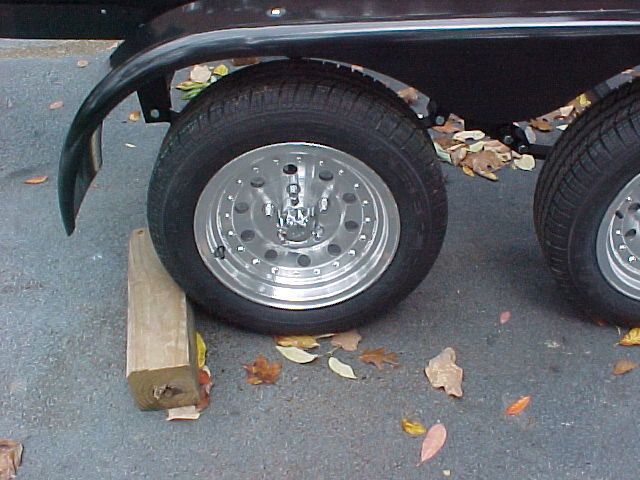
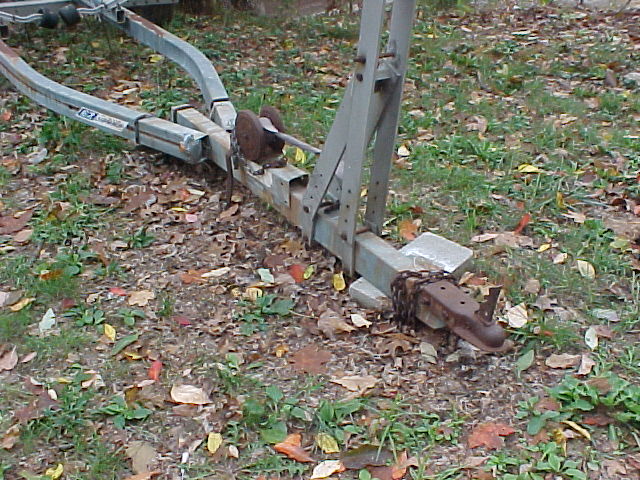
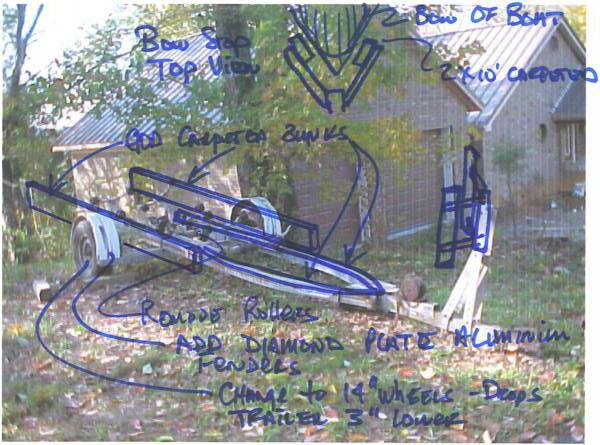
Trailer Ideas!
Customize trailer to make it
Exactly fit the boat to Support boat well
"Slick" Sleek and good looking
Reliable
Add additional bunks outboard of existing frame
Existing frame too narrow to properly support boat and keep so we can add "stabilizer bunks between the wheels and the existing frame.
Add carpeted bunks to the existing frame and have it ADD to the support provided by the stabilizer bunks.
Add custom "goal post" style bow stop with carpeted bunks to the front of the trailer
Purchase / Install New winch
Purchase / install New Jack
Sand blast and paint trailer
It's galvanized but there is a great deal of rust on the trailer. Blast the rust off and smooth the galvanizing in the process. Paint with XOrust high gloss paint so nicks and scratches from the road are easily touched up.
Replace Wheel bearings - just in case sand finds its way in......
Replace fenders with diamond plate aluminum pic - below right
Replace wheels with Aluminum 14" wheels and low profile tires. Lower trailer by 3 inches!
Add new LED light and wiring kit
Add Telescoping loading guides - these are made of steel posts and plastic pipe "floats" covered with a canvas skin for appearance. The floats extend the guides when the trailer is backed in at the ramp.
November 9th 2007 Update!!
The picture on the left shows how a new African Mahogany plank has been laminated to the back of the original damaged plank of the "Chubby D".
The picture to the right is after the new assembly has been thickness planed to remove the damaged area of the plank. After the damaged area of the original plank was planed off, material was removed from the new wood side of the assembly to bring the assembly to the thickness of the planks on the boat - 7/16".
This process ensures an ideal / original grain match of the wood on the boat. There is an adjacent plank that is also undergoing this process. This process takes about the same amount of time as replacing the plank, but is superior in terms of appearance due to the original grain and color match - as it is the original wood that shows! It also Preserves as much of the original boat as practical during the restoration process.
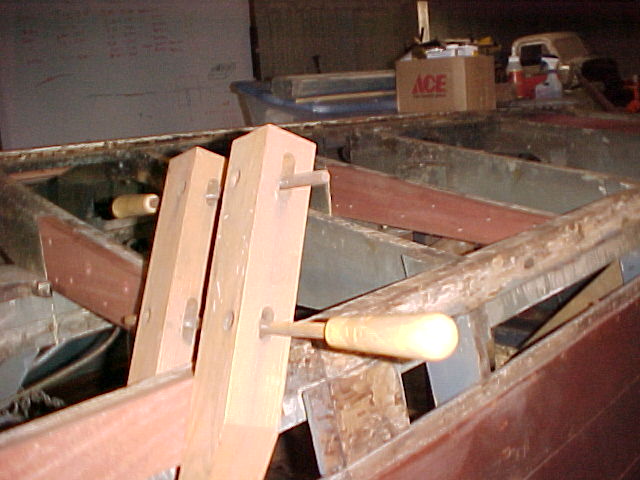
Alas, there will be two planks on this side of the boat that were too badly damaged to use this process on and will be replaced matching the grain and color of the original wood just as closely as practical. One of the duplicated planks is pictured in the workbench vises below.
The picture on the left shows 3 small localized areas of rot were found when the bottom strake (row of planks) on the port side was removed. These areas are about 1/4" deep and will be routed out the area treated with Smiths clear penetrating epoxy sealer (CPES) and new wood inlaid and faired out. Part of this strake gets the original planks replaced and part of it will have a new plank.
The picture to the right is a close up view of the rot at the center arrow in the picture to the left. There is just a little rot in the ends of the frames as well that will also be removed.
If these were not removed I suspect rot repair would be required in another 10 years to this chine area. It would be MUCH more difficult 10 years from now!
/\
/\
/\
The transom planks have been removed and will get new wood after the side planks are completed. The Bottom plank (top in the picture) will be replaced before the bottom planks are installed to $ave time.
August 28th 2008 Update!!
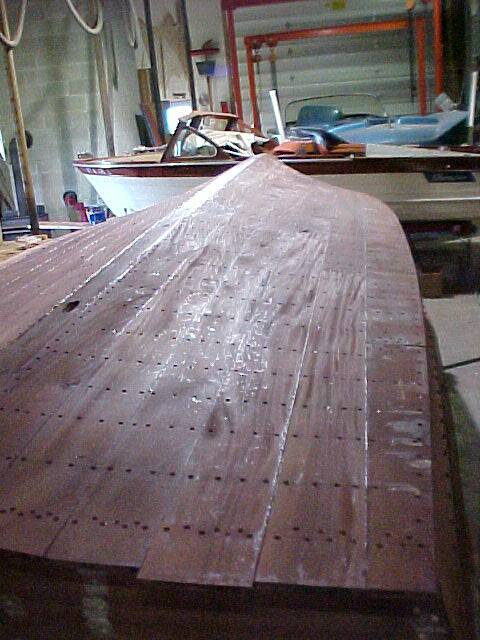
The bottom is on!
Once the preparations are complete we remove one plank at a time and bed the plywood inner layer with 5200 and also bed the back of the plank to be installed. Then the plank is installed and fastened down, and the process repeated 23 more times. This process takes about 10 good hard hours per side with a craftsman and a helper.
12 planks per side - 6 strakes (rows of planks per side)
The planks are fastened to 15 ribs and 21 intermediate ribs, the chines and the keel with Stainless Steel wood screws (about 1200 per side in all) and 3M 5200 Sealant.
Just a little over 2 tubes of 5200 per plank were used at 26 tubes of the stuff per side. In all 58 tubes of 5200 were used including tubes to bed the 4mm BS1088 Marine Plywood inner layer the bottom row of side and transom planks and the bottom planks pictured above.
At the end of the day, Immediately after fastening down the planks bed in 5200 the planks were wet down and covered with plastic so the water would soak into the planks and the planks expand before the 5200 cured. (it takes 7 days for the 5200 to fully cure) This process ensures the planks are permanently and completely sealed against one another and against the plywood inner layer.
The washers seen on some of the fasteners will be removed and countersunk fasteners will be placed. These washers are used to prevent cracking of the planks as they are installed.
The next step is to fill all the screw holes and sand the bottom fair ( remove any high spots ) - then do a final trimming of planks to length at the transom and to width at the chines. Once that is completed the bottom will be sealed with Smiths Clear penetrating epoxy sealer and moisture will not migrate in or out of the planks in the future.
Because we had to replace all but one of the hull side planks the waterline will have to be etched into the wood to permanently mark the location of the boot stripe.
The last steps - epoxy barrier coat and Bottom paint are applied up to the bottom of the boot stripe! Whew!! Can't wait to launch this baby!
Final preparations
The last preparatory step after the structural members have been repaired or replaced, the old planks duplicated, the new planks trial fit and the plywood inner layer installed is to install the planks once again with 1/16" spacers between them and pre drill all the holes for the15 ribs, the 21 intermediate ribs and the butt blocks. The intermediate ribs are the small natural colored ribs in the picture above. About 1/2 of the intermediate ribs have to be steamed to the contour of the boat bottom. These are the ribs from amidships forward. This process takes about 9 hours per side with a craftsman and a helper.
November 14th 2008 Update!!
The spray rails have been installed. the Starboard spray rail is new and the port was reused with a repair where a trailer tirehad rubbed the spray rail in two and nearly set the boat on fire.
The bottom was painted with 3 coats of Epoxy barrier coat and 3 coats of Antifouling Hard Racing Bronze. Usually the choice of antifouling or hard racing is one or the other. However, with a little resaarch I found the Pettit brand had a combination product.
The transom was also replaced and is shown here after it has been faired out - bungs filling the screw holes and faired out ready for staining. The boot stripe location has also been etched in.
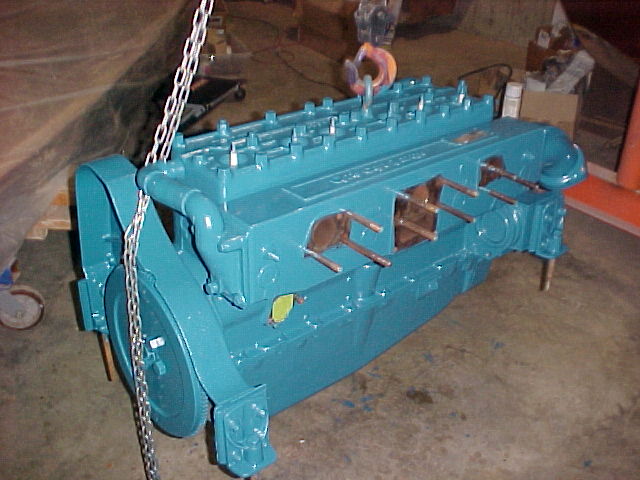
We have no special page for the detailing of the engine so we'll put it on this page for the owners convenience.
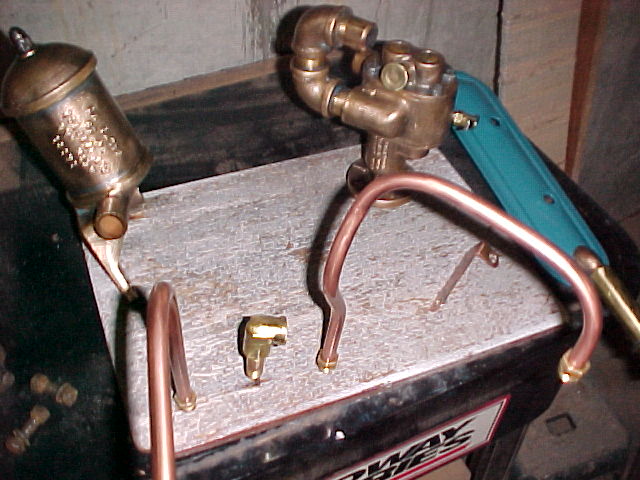
The engine has been degreased, pressure washed with hot water, wire brushed with an air powered high speed die grinder and painted with Chris Craft Blue paint that will retain its color to 550 degrees f. The sand cast bronze parts, brass fittings, and the copper tubes have gone through the same preparation process and have been clearcoated. Originally these clear coated parts would have been painted blue... as a matter of fact even the hoses would have been painted blue at the Chris Craft Factory! This gives the engine a bit more wow when the engine hatch is open!