Number 3 & 4 cylinder not firing. Unknown if it is the head gasket or valve adjustment.
We have your fuel tank straps installed and tank secured.
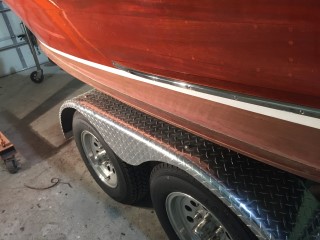
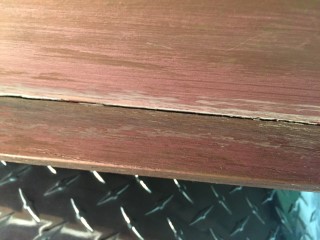
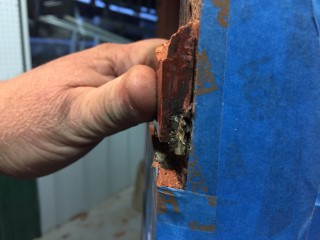
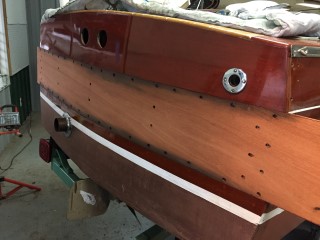
Here we are taking care of a problem that occured when 5200 was placed over paint which prevented the 5200 from bonding with the wood. In order to fix this we are removing the bead of 5200, then sanding the seam back to bare wood. Then once this is done we can put a new bead of 5200 in the seam and then fresh bottom paint.
Update 11/15/2016
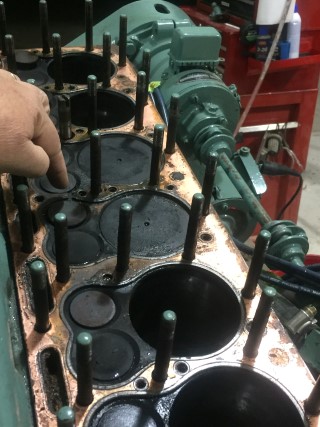
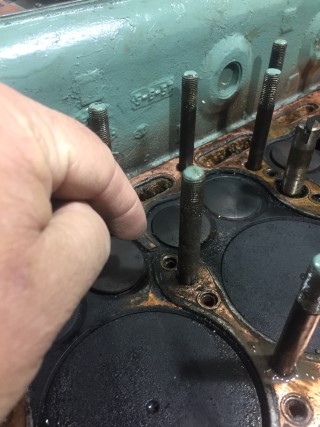
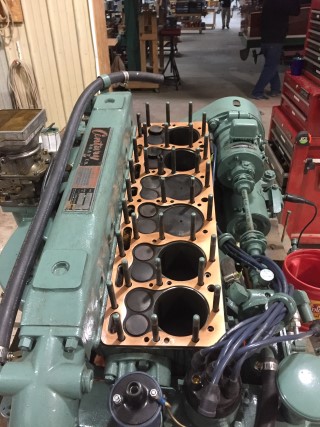
You can see here we removed the head and found where the head gasket split. We removed the old gasket cleaned the surface and installed the new gasket.
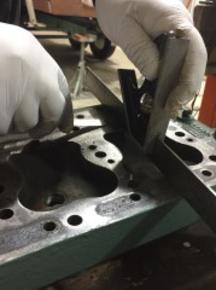
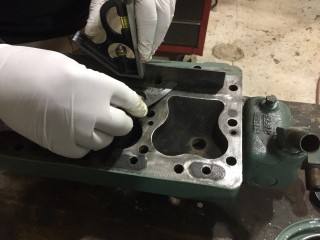
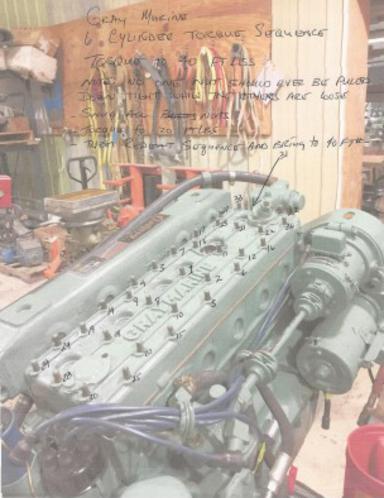
Here we are checking the surface of the head for flatness. We need to make sure that there are no gaps larger than six thousandths. The gasket will seal off any gap that is six thousandths or smaller. We checked the entire head for flatness using this method and it checked out fine. So now we reinstall the head and tighten the bolts to the correct torque specs with the correct sequence.
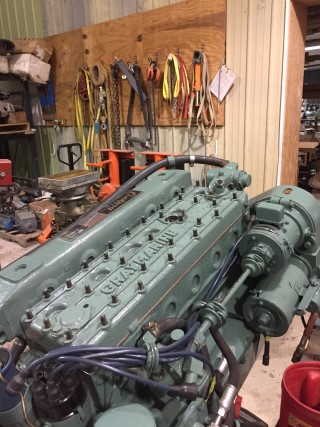
The head has been reinstall and torqued to the correct specs. We preformed a compression test and all cylinders read 130 psi with the exception of cylinder six which was 100 psi.
Update 12/15/2016
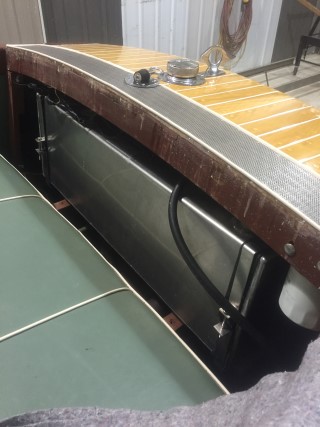
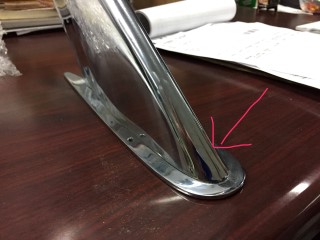
We are sending the pole off to fix the chrome, but as far as the locking mechanism this is the way it was designed and will be fine as long as you only use it for show purposes. I guarantee there are tons of these at the bottom of numerous lakes, due to the poor design. What we can do is on the front where the arrow is we can put a screw that goes through the pole and plate to secure it. This will obviously not be original but if you are wanting to run the boat with this attached this will keep it secured.
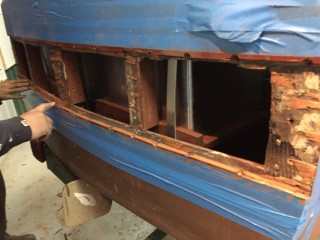
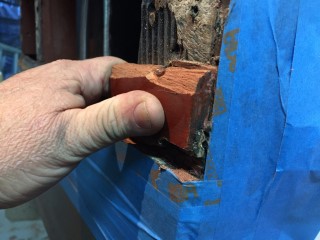
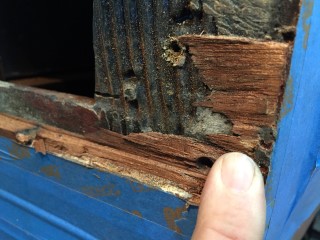
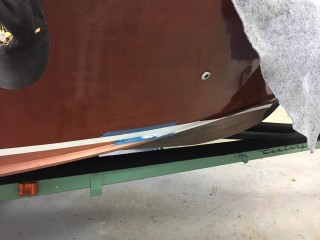
After we removed the plank on the transom we found that the only spot of rot was at the very edge of the plank and was not was not visible from the back side of the plank. This is more than likely the reason we did not find this spot before. There was good wood on the back side and front of the plank and just the tiny spot in the middle where rot was visible.
Update 12/19/2016
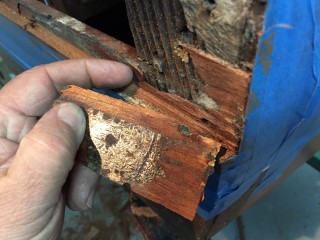
We have all of the old plank removed and the new plank cut planed and installed for a dry fit. Now we can check to make sure the thickness of the plank is accurate so that when we install permanently the transom will seem like one solid smooth piece.
Now that the plank perfectly matches the others we have installed it permanently using 5200. Now all that's left is to trim the edges of the plank and then shape it to the sides of the boat.
Update 12/27/2016
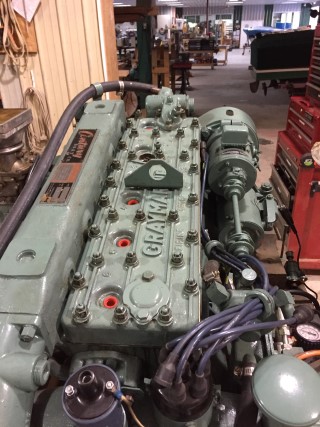
Repair screw holes from misplaced placard.
In Process
Completed
Rework bow flagpole lock.
Rework windshield chrome.
Replace plank on transom with rot.
Correct bottom paint issues.
Dock rash.
Engine diagnosis, replace tach cable. Charges for fuel and parts from before delivery. New oil pressure sender to make gauge read right.
Fuel tank straps.
Head gasket repair, valve adjustment and reinstall engine.
Shorten trailer/fix lights.
Steering wheel... make horn ring operate horn.
In Process
Completed
In Process
Completed
In Process
Completed
In Process
Completed
In Process
Completed
In Process
Completed
In Process
Completed
In Process
Completed
In Process
Completed
In Process
Completed
Varnishing
At Chrome Plater
At Supplier
Here is a list we put together so you know the status of where we are on the repairs for your boat. Green indicates current status of the project.
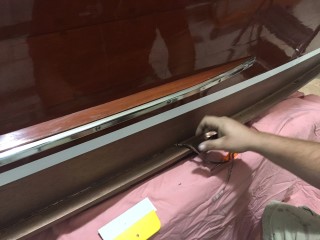
The new transom plank has now been trimmed to fit, stained and varnish is being applied.
Update 02/27/2017
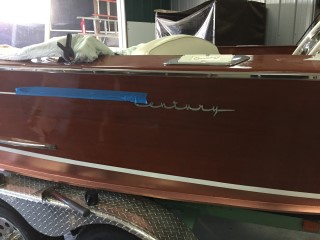
Look at that reflection!! Varnish work is now complete and it turned out incredible.
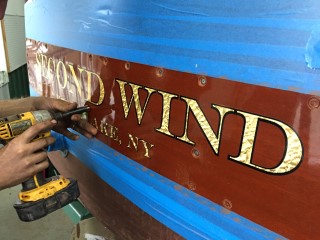
The new vinyl name has been applied and all that's left to do now is put all of the trim back on the boat and install the windshield frame once it comes back from chrome.
Update 03/02/2017
Update 03/22/2017
Update 4/28/2021
Update 4/30/2021
Update 7/29/2021
Update 8/4/2021
Update 8/20/2021
Update 11/4/2021
Update 11/24/2021
Update 12/2/2021
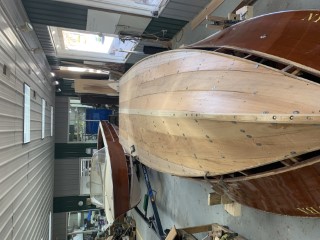
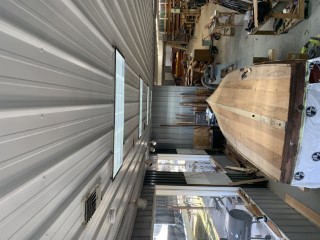
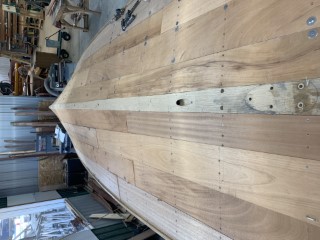
All of the bottom planks have been made and dry fit to the boat. Now we will remove them and finish painting the frame work. Once the framework has been painted we will install the plywood layer that goes between the frames and bottom plank. Then we can install the planks back onto the boat with 5200 adhesive. Though that may sound like a lot of work left its really not. At this point it just a matter of cutting the plywood layer and putting the pieces together.