The spark plugs were all finger tight. The valve cover fasteners were also finger tight.
Update 01/20/2017
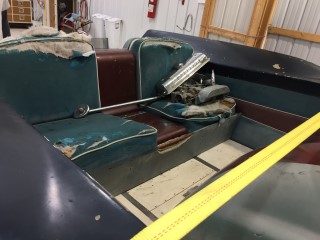
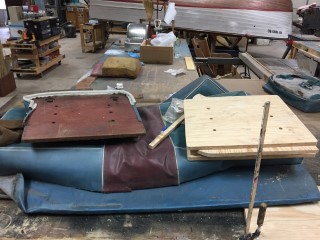
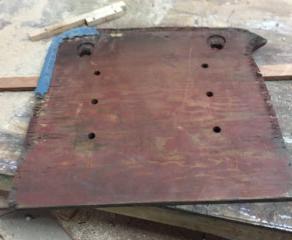
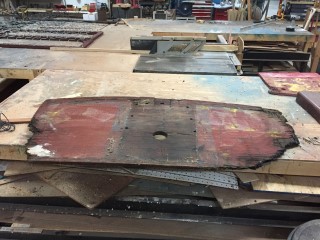
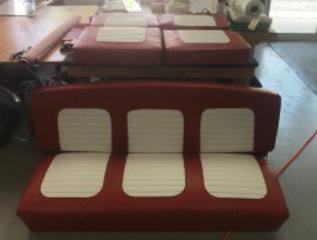
We have been working hard fabricating your new seat bases. We have not only one but two sets of Silver Arrow seats to reproduce. Once we have all of the seat bases fabricated we can then turn them over to our Custom Canvas division and they can begin recovering the seats.
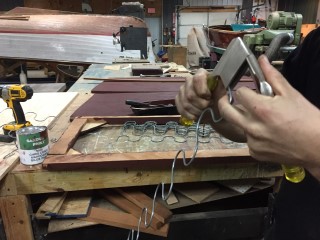
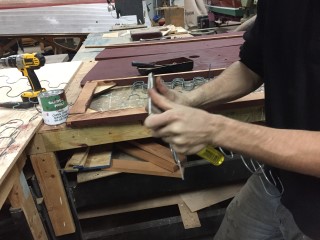
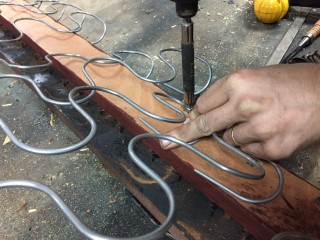
The front seat bottom to your boat is made up of a series of springs crimped together and fastened to a wooden frame. Here is a look at the process of hand bending the springs that will be used to make up the inner part of your seat.
As mentioned before each spring is hand bent. The first process of bending the springs into the "S" shape is not shown above but that process we also do by hand. So each spring starts out as one long straight piece of metal to eventually become what you see above.
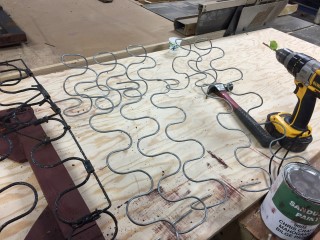
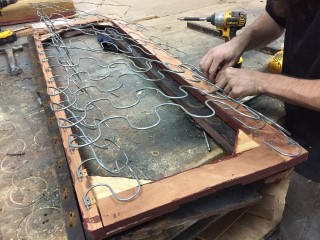
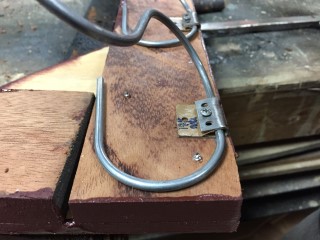
Once all of the springs are bent we then crimp hangers onto each end of the spring then attach the hangers to the wood frame to secure each spring in place.
Update 01/23/2017
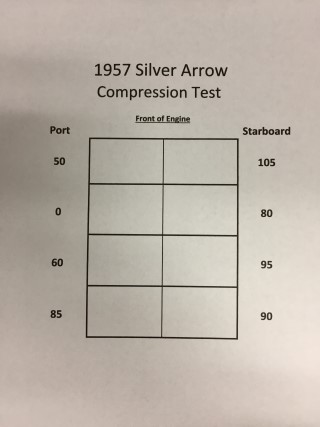
Here is your engine!
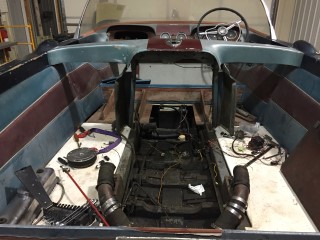
And here is where your engine use to be! The engine has been pulled and next the heads will be removed then taken to be gone through and properly fixed. While the heads are off we are going to measure the bore of the cylinder to see if they are wore in an egg shaped pattern. If so further tear down may be required. Right now we are still in the discovery stage the further we dig the more problems we may or may not find. One thing we do know is that the oil distribution line running to the heads are home made and not functioning properly, so they will need to be replaced with a proper distribution line. We will keep you posted on any issues we may encounter along the way.
Update 01/25/2017
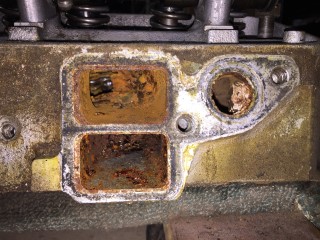
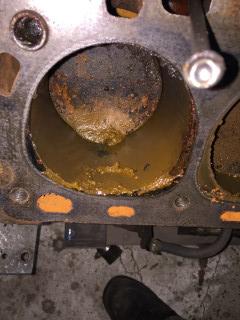
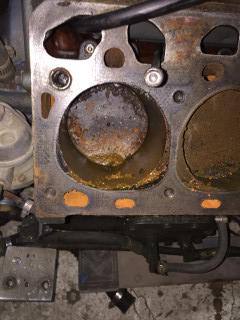
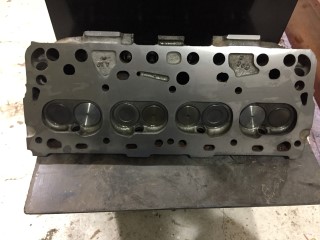
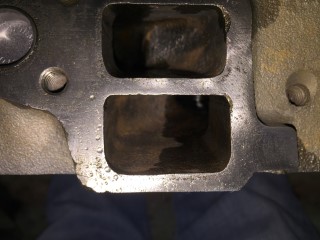
While we were tearing down your engine we discovered that all of the bolts holding on the intake manifold and exhaust manifolds were just a little more than finger tight. Apparently someone had put the bolts in place and "snugged" them up but never tightened them nor torqued them to the correct specs. The pictures above show the cylinder and ports in the head where the stuck valve was located. There was a lot of build up and rust as you can see in the head and a slimy build up in the cylinder itself. The heads are being rebuilt as we speak along with the alternator and starter.
BEFORE
BEFORE
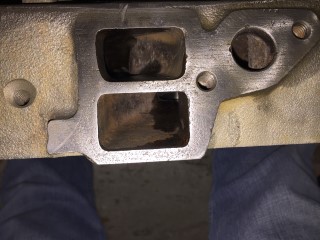
AFTER
AFTER
Update 02/01/2017
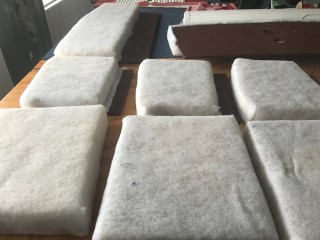
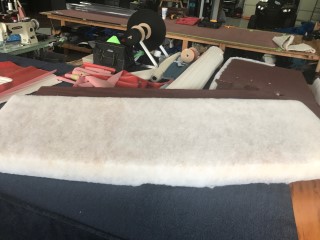
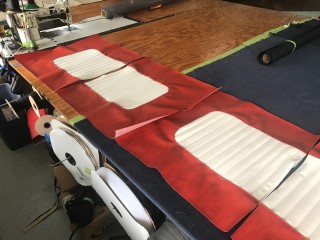
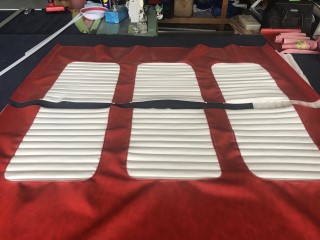
We have the new foam cut and glued to the new seat frames and have started sewing the vinyl. Its all starting to come together.
Update 02/08/2017
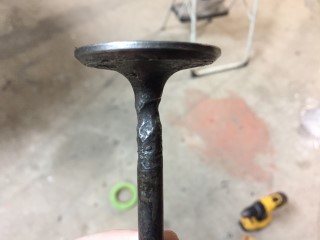
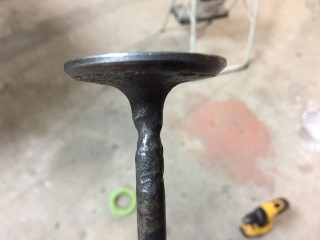
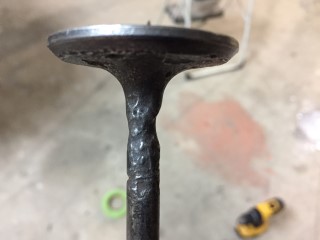
There were three valves that had to be replaced in your heads. You can see in the pictures above the reason why. For some reason the stem was eroding away.
We got the heads back today and everything looks good. As mentioned before three valves had to be replaced also there were new hardened seats put in. New bearings were put in and everything was gone through and cleaned thoroughly. They said they wore out three wire brushes cleaning out the ports.
Update 02/09/2017
Update 02/10/2017
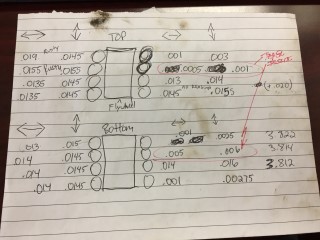
The green line indicates the row that you should refer to for info on the 312 Interceptor. As you can see on the left image the cylinder that is circled in red definitely has a taper issue. The taper allowance is only .005 and you are at .0045 now which means the cylinder is right at the limit and will need to be fixed.
Update 02/16/2017
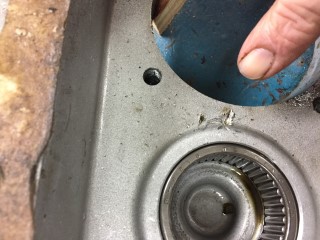
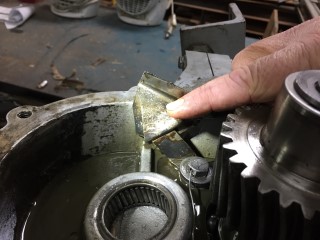
As mentioned in the video here are the spots where damage was apparent.
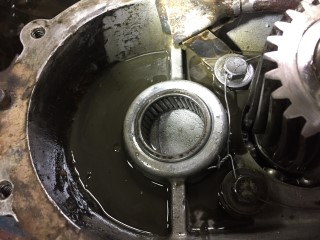
Here you can see water that was inside the transmission a little clearer.
Update 02/17/2017
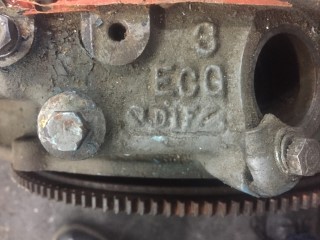
So we found out that the engine is NOT a 312 but rather a 272. The 312 produces 215 hp and the 272 produces 175 hp. There is one big problem with the 272 the pistons are made for an engine that is bored 60 over and your 272 has been bored 90 on 5 cylinders, 100 on 2, and 105 and worn to almost 110 on 1. So the options we have for this engine is to sleeve the cylinders and rebuild it that way or we can find a 312 block and build an actual 312. Everything that came off of your 272 will fit the 312 so if you decide to build a 312 your in the same place as rebuilding the 272.
Update 02/21/2017
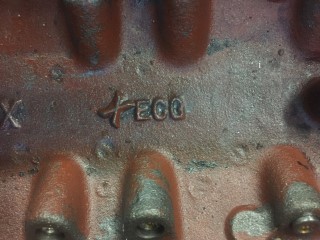
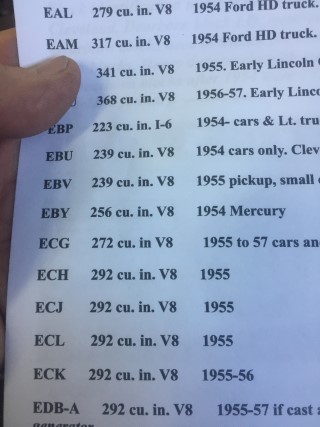
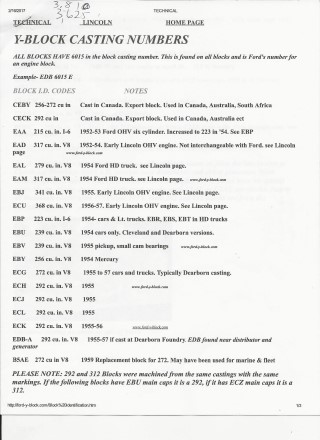
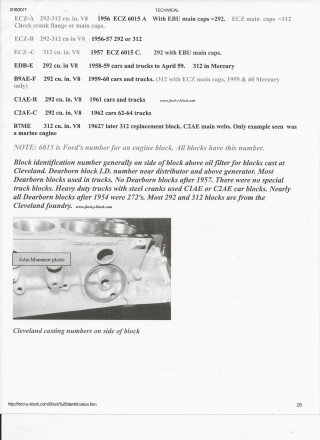
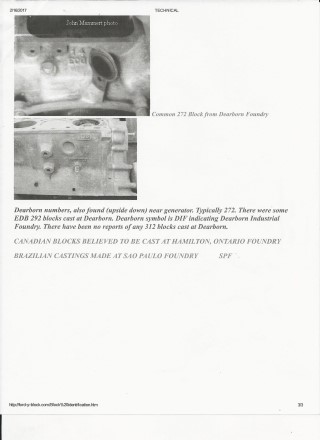
Y-Block Identification
Update 04/14/2017
Update 04/25/2017
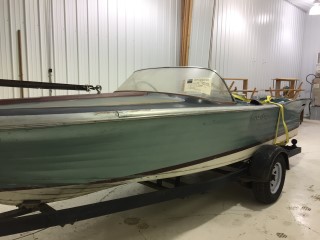
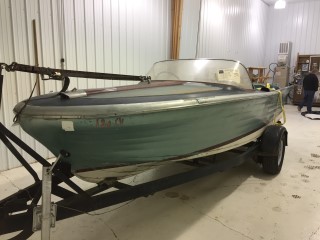
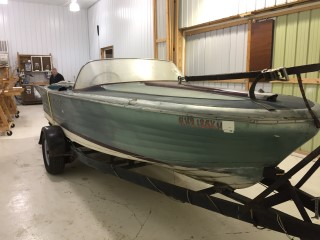
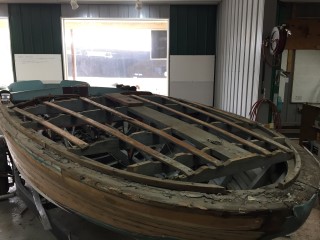
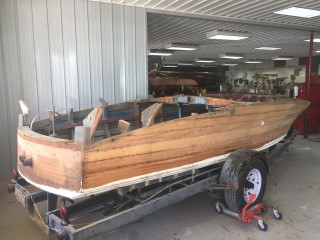
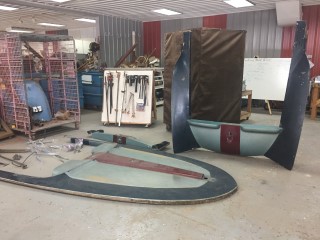
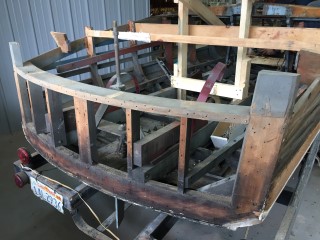
As you can see we have started removing the fiberglass from the boat. Once all of the fiberglass has been removed from the top and sides we will then start removing the side planks. We are removing the side planks not to replace them but to plane them down flat and refasten them to the boat. As of now the side planks are cupped out and after we plane the boards down it will give you a nice smooth finish to the sides of the boat.
Update 04/28/2017
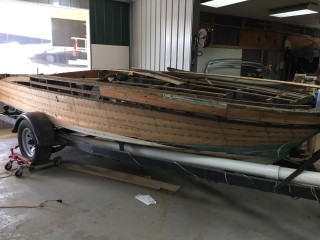
We now have all of the fiberglass removed from the decks. The next step is to remove all of the side planks and plane them down to remove all of the cupping that has developed. What is cupping you might ask? Cupping is essentially where the planks have bowed in such a way that the middle of each board bubbles out just a little and makes the side of the boat seem wavy rather than smooth. The idea is to remove each plank and plane them down enough to remove the bubble or cup which in the end will leave you with a nice smooth surface on the sides.
Update 05/05/2017
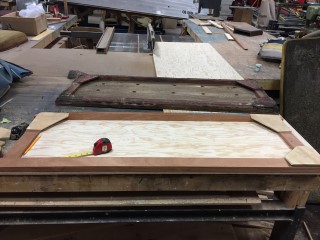
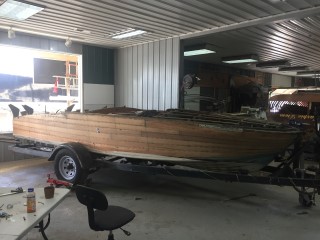
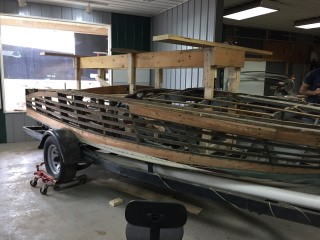
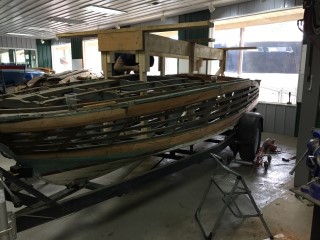
We now have all of the side planks removed as far as we can get to. We have also started planning the boards down to make room for the layer of ply. The plan now is to flip the boat to make it easier for our guys to finish the job. So if your wondering what the frame that has been built inside of your boat that is what the boat will rest on once flipped. Below will be a time lapse video of the process of flipping the boat over.
Update 05/11/2017
Update 06/13/2017
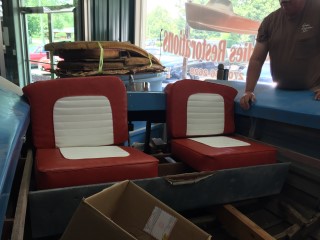
We now have the seats completely finished. We test fit the rear seats in another Silver Arrow we are restoring since yours is flipped over at the moment.
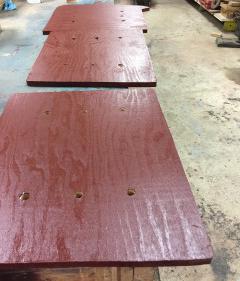
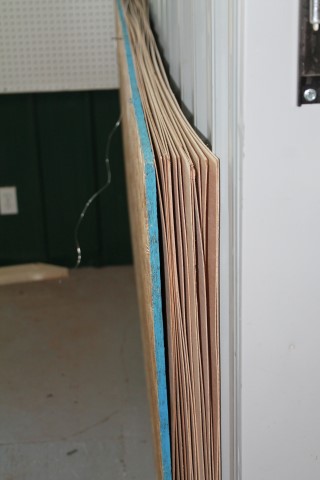
The wood came in that we will be using to cold mold the sides of the boat with. We still need to apply Clear Penetrating Epoxy Sealer to the ribs then we can reattach the side planks and then begin the cold mold process.
Update 08/24/2017
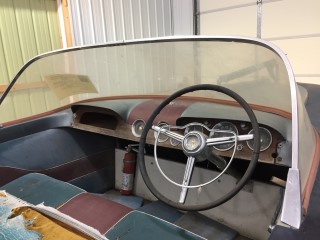
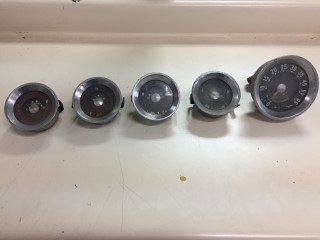
Here is what your gauges looked like before we had them restored.
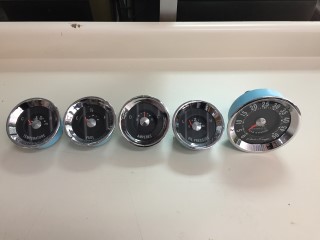
This is what your new gauges look like. These are going to look great in the dash of this Silver Arrow.