

New Toll Free Phone Number 866-921-2628
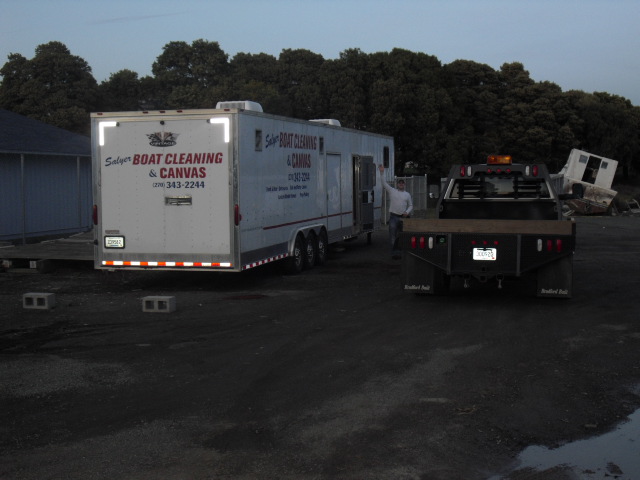
There are a number of projects we are accomplishing on this boat right in its slip in Vallejo California.
Improvement Projects
Slip Protection Edge bumpers on dock
Boat Fenders and Lines
Life ring and holder – period correct with Jupiter as graphics on ring
Vintage Chrome Compass (hold)
Clean / Upgrade cushions on boat
Additional Canvas Covers (Hold)
Research history / ownership of boat
De- humidifier permanently installed
Fiberglass touchups
Varnish cap rails
Varnish Cabin sides
Varnish Cockpit
Install electronics in drawer under steering wheel
Install Kill switch and / or personnel strap at wheel
Install new light, bilge blower, and horn switches
Varnish Aft cockpit
Varnish Transom
Install fuel tank equalizers
Develop GPH chart on engines so that fuel consumption may be predicted / controlled
Install fuel vent valves
Modify Rib so forward head door opens properly
Install Head and or shower combination in Aft stateroom locker - outdoor shower
Widen Aft State room bed (can be widened 9-1/2”)
Install Anchor windless and outside hull anchor storage
Purchase and install new 12 volt air compressor and compressed air storage tank for Grover Products air horn but also sufficient to inflate dinghy.
Purchase and install depth sounder
Make anchor light assembly easy to remove and install
Install strap(s) for safety at helm
Breaker Panels Consolidated / Remote monitoring?
Install Inverter
Maintenance Projects
Loose Screws
Chrome Polishing
Adjust Rudder as boat pulls to port side
Replace water heater
Replace Headliner in cabin
Flush water tank of debris
Replace shaft logs
Find / Replace wire nuts used on wiring
Replace substandard wiring on light fixture in Salon (completed during assessment)
Replace missing cleat backing plates
Secure bow light wiring that was being stretched by anchor tackle (completed during assessment)
Check House batteries
Produce owners manual of boat and accessories
Update March 3rd 2010
The items an the above list that are Green are completed. Below is the detail on each of the projects completed thus far.
Dock Edging and protection
Boat Fenders and Lines
Life Ring and Holder w/ rope
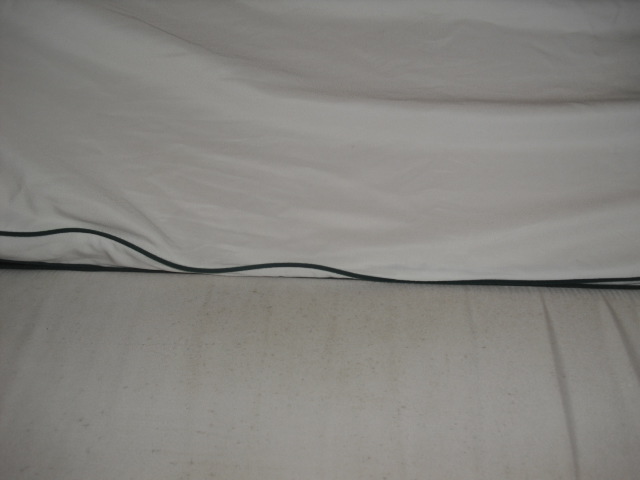
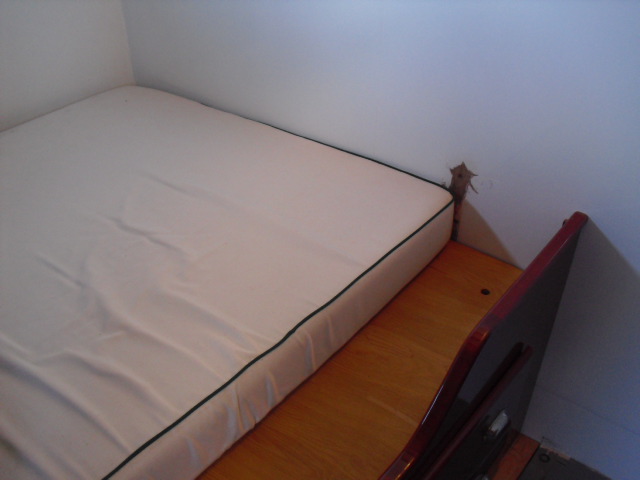
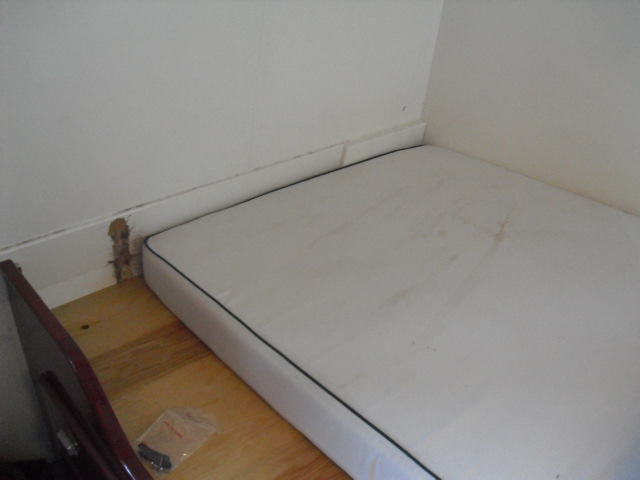
Clean Cushions
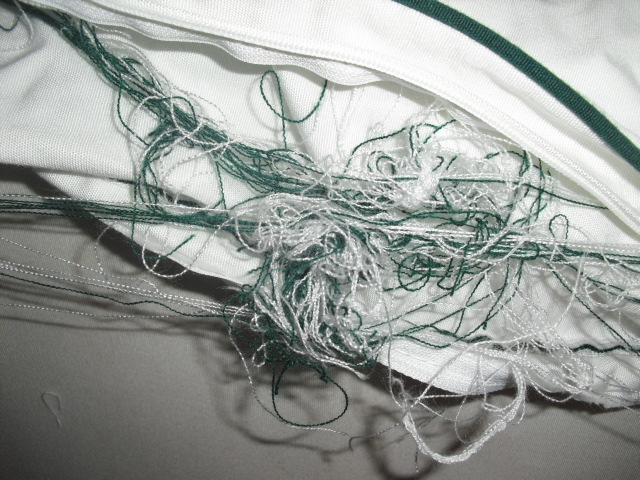
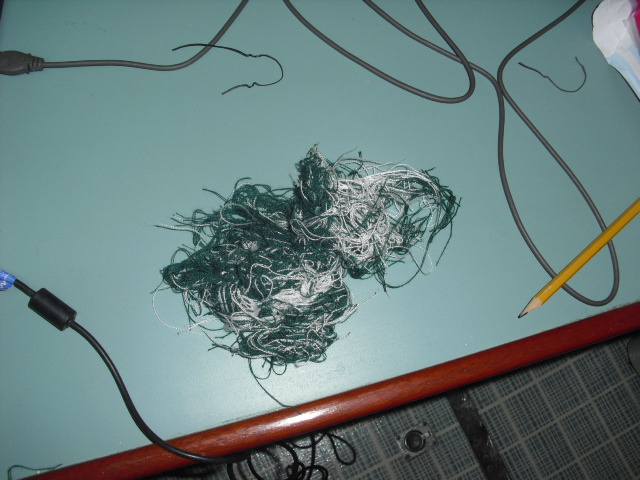
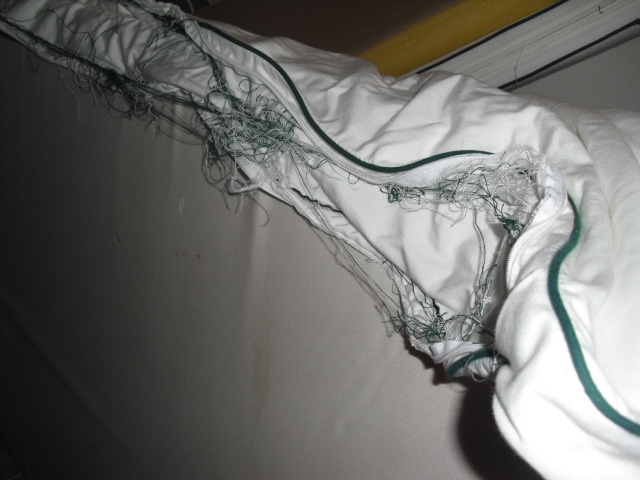
Cleaning with the recommended concentration of Clorox Bleach and hot water got rid of the mildew stains on the cushions and did not hurt the green piping. All the zippers were stuck on the cushions and it will take about $300 to replace the zippers at a local canvas and upholstery shop. Picture below is the unraveling that occurs during the washing. In fact there was some unraveling evident before the laundering. The material merely unraveled to the stitching and not past the stitched seams. It took about 10 minutes to cut the excess threads from the seams before putting the cushions back on the foam.
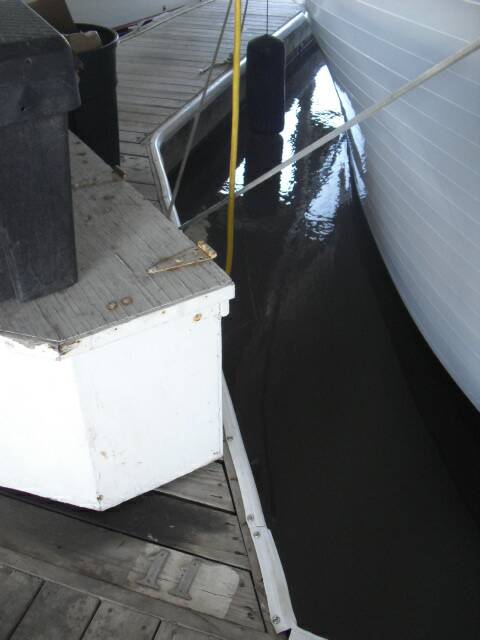
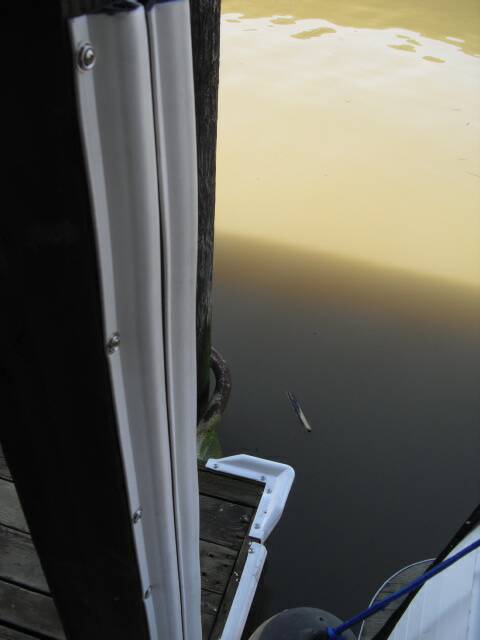
Dehumidification
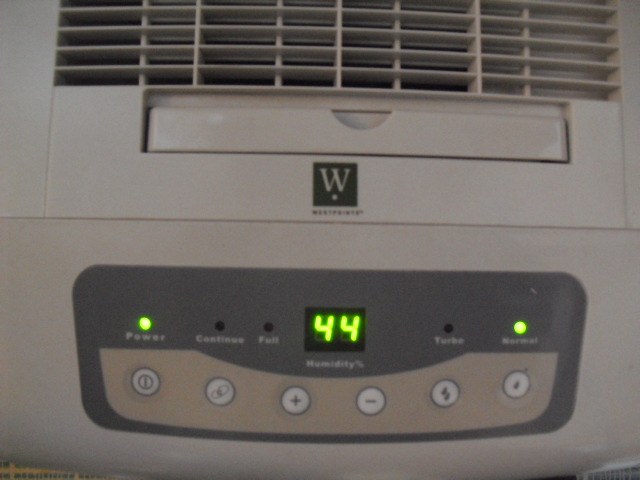
When we arrived and set up the dehumidifier the relative humidity inside the boat was 77% and the temperature was 60 degrees. At that humidity if ANY surface in the boat is colder than approximate 53 degrees (dew point temperature) water will condense on that surface... like dew. At 44 %RH surfaces will have to be water will not condense on any surface warmer than 38 degrees. So now the weather outside can fluctuate and the inside of your boat should stay mildew free as there should be no water condensing on surfaces or bed clothes.
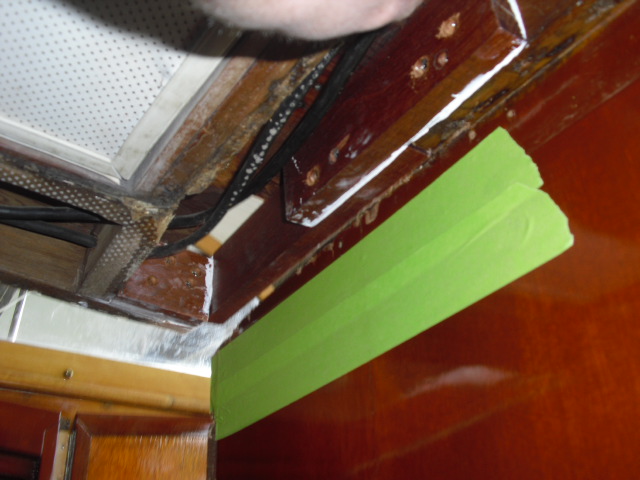
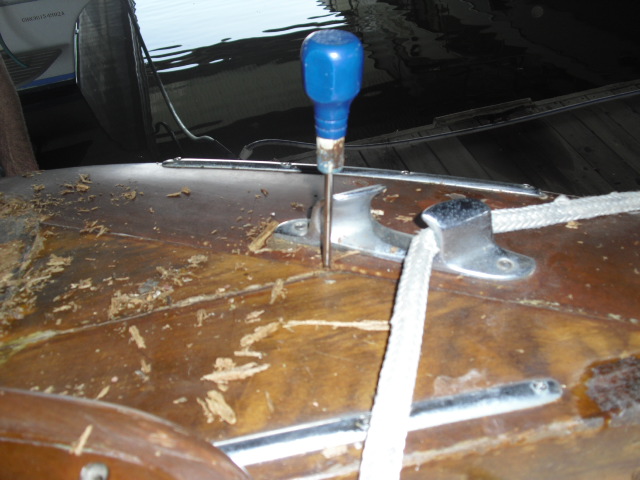
I'm going to drill a hole in each one of the finger pulls for the bilge access. When you leave the boat you can put the dehumidifier tube through any one of these openings. They will be inconspicuous and you'll have 3 choices for where you place it.
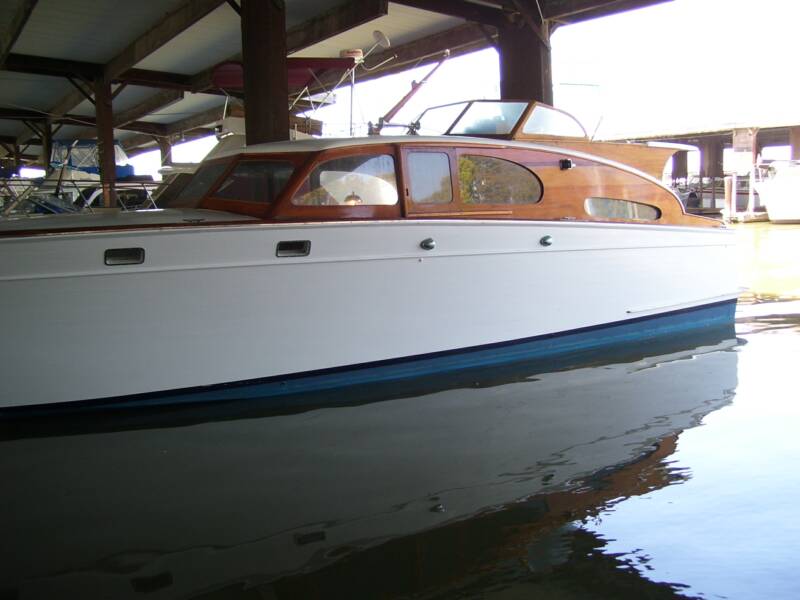
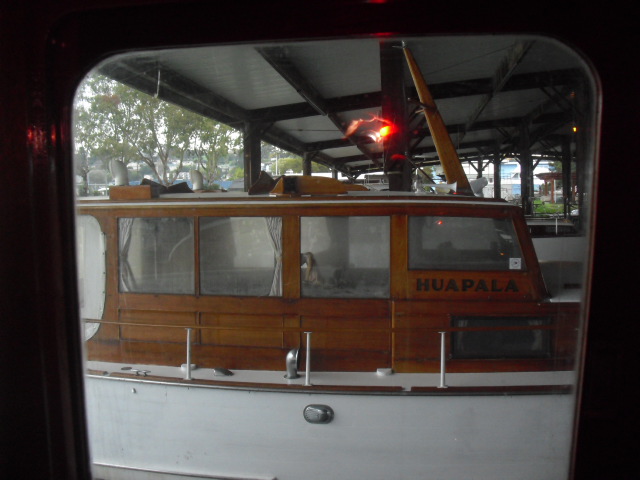
The picture to the left illustrates Dew Point very well. This photo was taken from inside Jupiter's Salon of the neighboring boat. Surfaces in the neighboring boat are under the dew point temperature for the air in the interior of that boat! Hence the condensation (dew) on the inside of the windows. There is no condensation inside Jupiter!
Green = Completed Orange = started Black = Still to do
Install Fuel Vent valves
We now have a photograph of the fuel air separator! One of two.
We did notice in a California pamphlet on environmentally sound boating these are suggested in that publication!
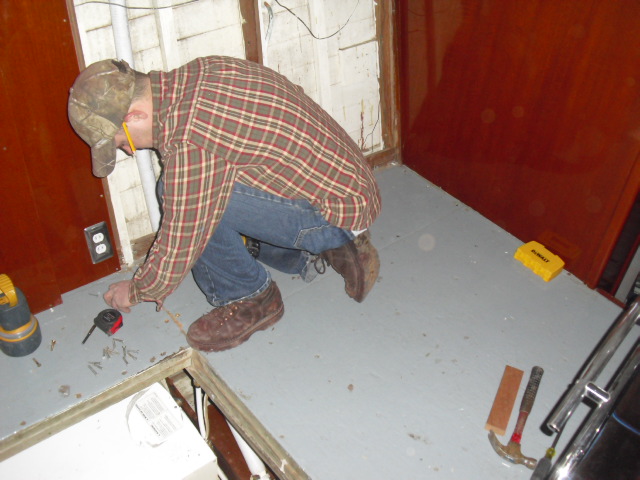
Widen Aft State Room bunk
This one was a booger!
The original structure was fastened to the floor with staples similar to what is used in cabinet manufacturing. We were prepared for the staples and brought a special tool to cut the staples off. What we didn't know is that the frame was also GLUED to the flooring. It took over 1/2 day just to remove the frame that was there. We then modified the frame and built new components for it to make it easily removable in the event someone has to access the Port shaft log in the future. There a little filler and paint work to be done on the walls. But that won't occur until we are doing the outside painting or painting the fwd head. The width is now 11" wider than it was. It is now wider than a full size bed and the length has always been longer than a California King. So this will take a custom mattress. I am told the mattress will cost about $600 - $800... not the $400 I estimated. The FOAM can be had for about $500, but if we want to have a cover sewn that is the difference in the cost. I'll have Greg look for a custom mattress manufacturer also and maybe we can keep this cost around the estimate. I am told that if we leave the piping off the cover this will save considerably also.
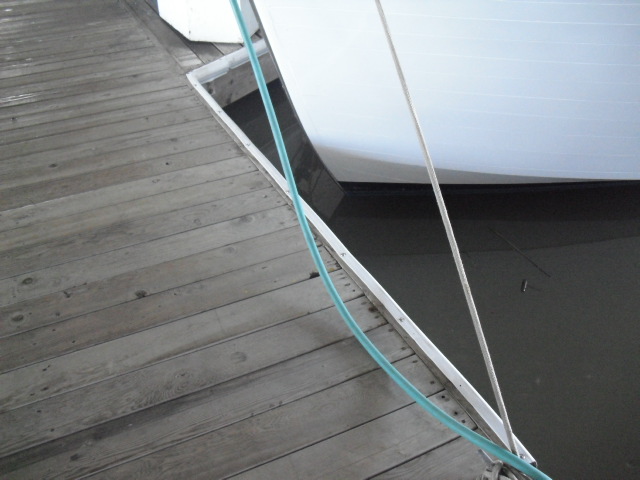
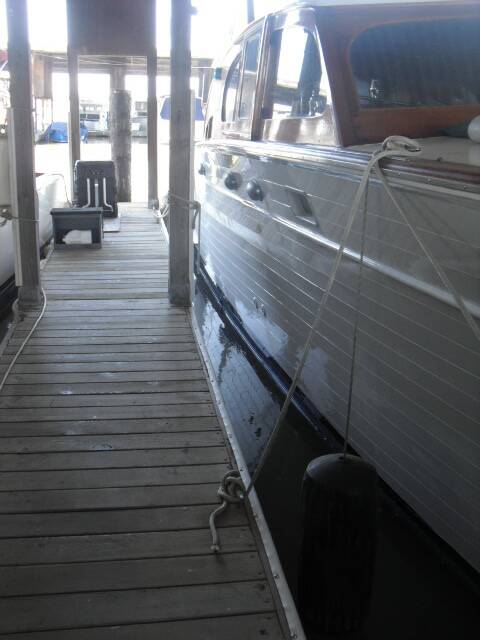
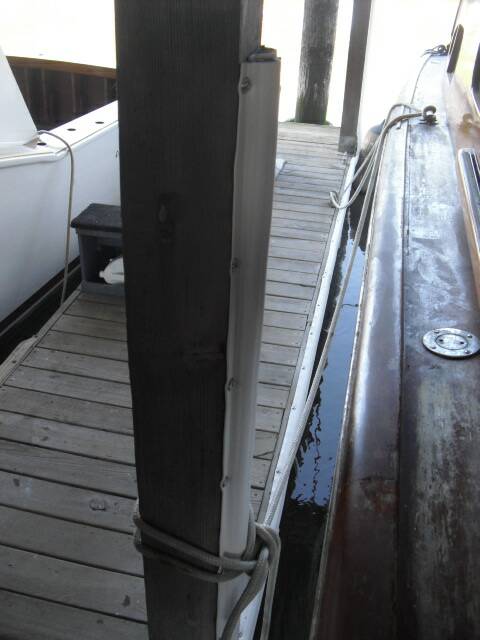
The old dock edging has been removed and the new edging to replace it and protect Jupiter has been installed using stainless fasteners and finish washers.
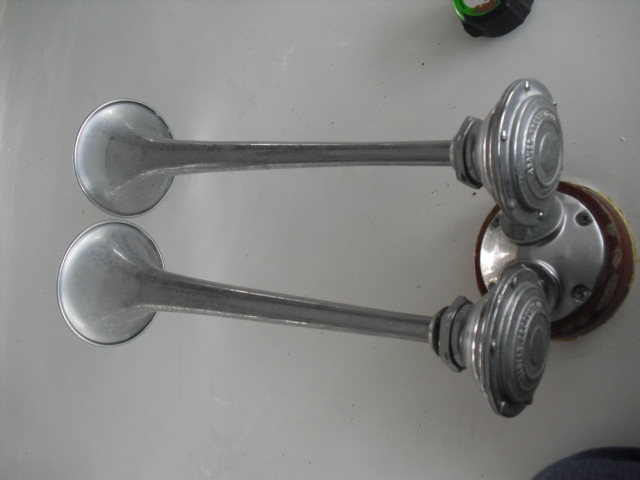
Purchase and install new air compressor
The new air compressor is installed along with a new horn switch and new copper tubing to the 12v electric valve that controls air to the horns. Initially the horns did not work!?!? but with a little cleaning of the metal diaphragms inside them we were able to get one working. I am in contact with Grover Air Products to determine the model of air horn and in turn the part number for a rebuild kit for this horn.
Modify Anchor Light assembly to make it easy to remove
The screws have been removed and the detent pins installed (after some drilling out of the metal portion on the bottom of the mast to allow the 1/4" diameter pin to pass through. I have Stainless Steel 1/16" wire rope lanyards coming from the shop to secure these pins to the assembly so it they can't be lost.
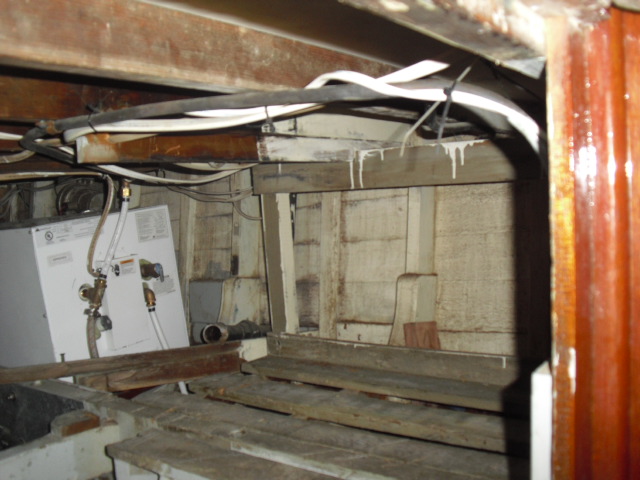
Replace water heater
The old water heater was badly rusted out at the bottom and basically fell apart as we removed it. The plywood "shelf it had been sitting on had some rot due to the rust in contact with the wood so we removed it and built an new slatted platform to install the water heater on. All electrical and plumbing hookups have been made with the exception of tying the engine cooling system in with the heat exchanger inside the water heater. The old heater capacity was only 12 gallons and the new is 20 gallons. I did look into an on demand type heater. With the amount of power you have on your boat we could only make 1 gpm of water that was 17 degrees higher than what you start with in the tank. Your shower requires 2 gallons per minute of water (hot AND cold) but once you mix a gallon of say 87 degree water with a gallon of say 70 degree water the shower is pretty cold. With the amount of power available on the boat the best way to go is to make 20 gallons of water hot over a long period of time and use it when you need it. AND we are able to capitalize on engine heat as well to make hot water.
This project will go over the budget for the line item due to the upgrade in water heater and the difficulty of the installation. See the line item summary for how much. - it's not bad
Flush Water Tank of Debris
The operation was a success .... but the patient died!
Well I decided to get you a new tank instead of flush the old one. I was worried that I could spend a lot of time flushing and EXACTLY this happen. But we had limited choices when purchasing the tank, so I did my best guess on matching what was available with what would fit. BUZZER!!!! WRONG ANSWER!!!
So we went back to plan "A" which was to flush the tank. After flushing the tank I refill it and RATS.... water leaking from the tank.. Lots of water. The debris in the tank was sealing it off just as it had to the inlet of your pump!
So we go back to plan "B" and find a mfg in California that makes all shapes and sizes of tanks and puts the inlets outlets and vents where you want them.
SO at no additional expense to you we are shipping back the first new tank and have ordered in the second new tank. We begin tear out of the old tank this afternoon. There is no saving the old tank.....We will take it out in pieces. The new tank is 4" longer and small enough to fit in through the steps in the galley.
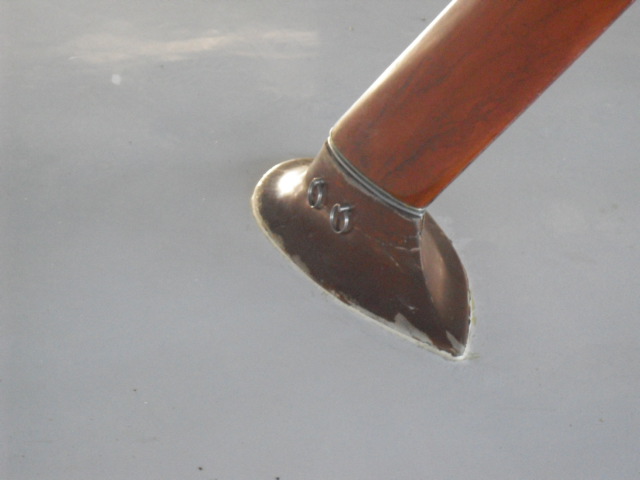
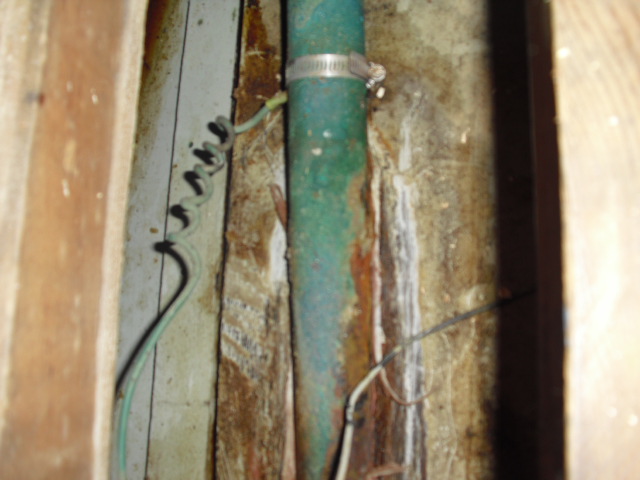
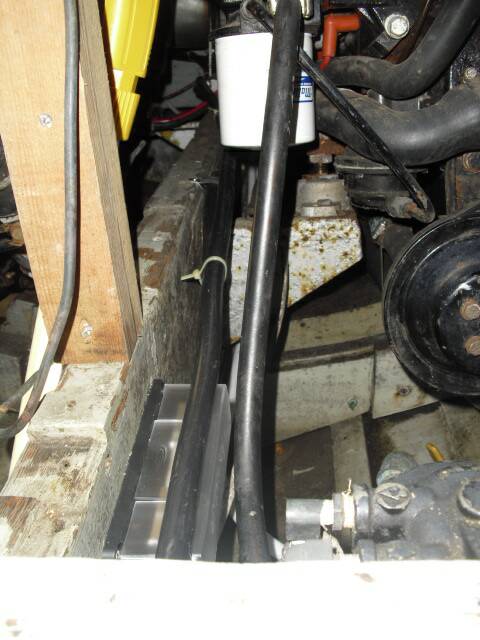
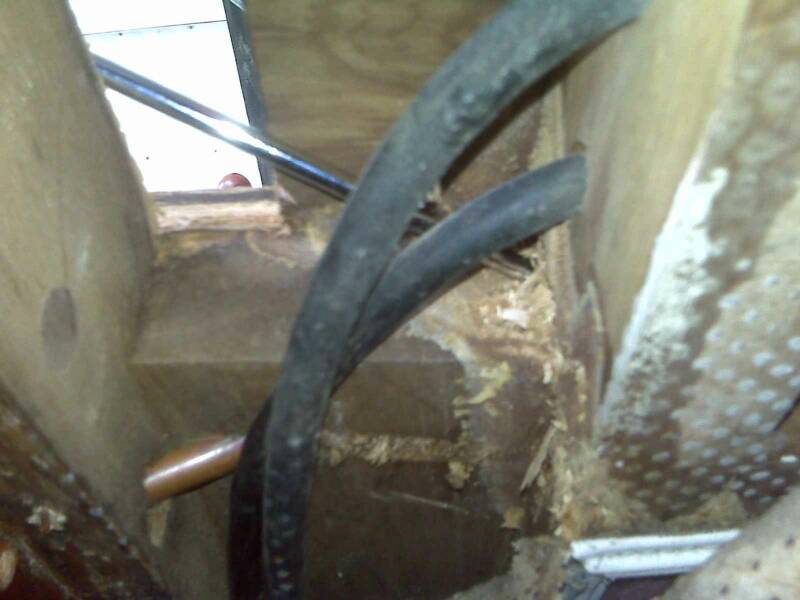
Shaft Logs are OK!
After making the access ways to the shaft logs as an addition to the bed widening we were able to inspect the logs more closely. The Corrosion turned out to be salt crystals! Oddly colored salt crystals. The marine "bubble gum" called Splash Zone was evidently used to seal a leak between the wood and the shaft log tube not to stop a leak in the tube itself. The bonding to these shaft logs was complete as far as the logs go. They were bonded to each other and they were bonded to the fuel line. There is at least one break in the bonding system at the port engine... their may be more we have to continue to look. Here is what the starboard one looked like after cleanup
Replace substandard wiring on light fixture in Salon (completed during assessment)
Replace missing cleat backing plates
Secure bow light wiring that was being stretched by anchor tackle (completed during assessment)
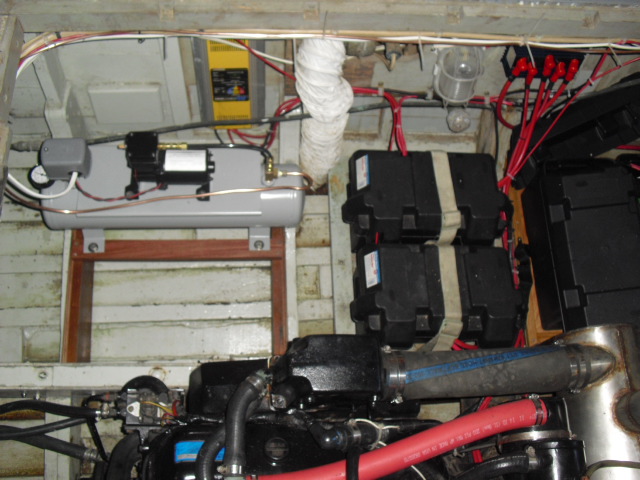
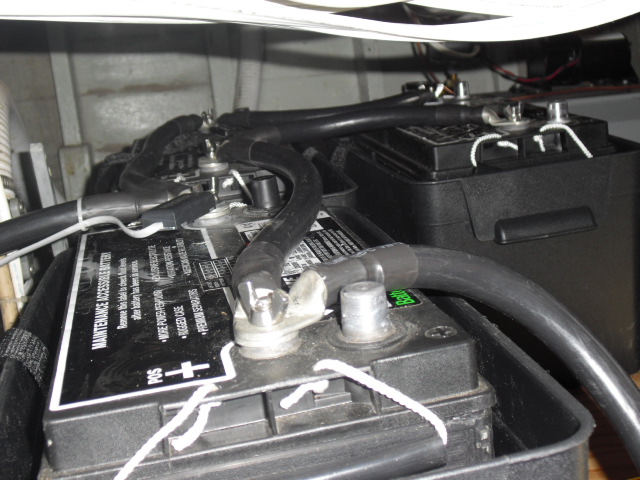
Check / Replace House batteries
Done... we forgot to take a photo before closing up the panels in the area!
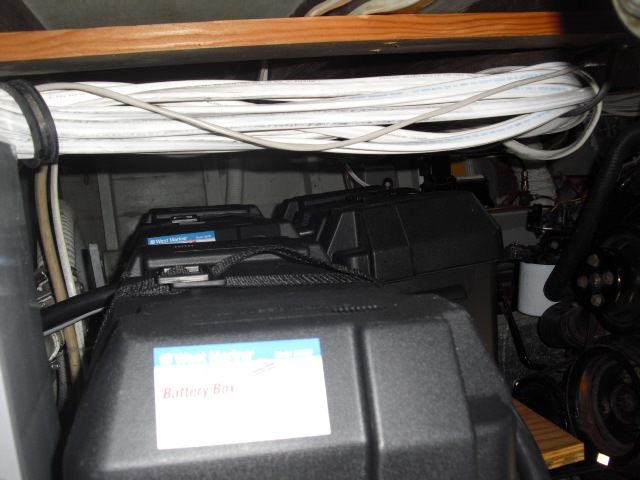
One of the House batteries still tested weak although it did test better than when we were here and tested it in August?!?!? In August it tested BAD under load, Today, one tested good under load and the other weak. So we changed both batteries from 6 volt golf cart batteries in series (to produce 12 volts) to two 12 volt batteries in wired in parallel to produce power longer at 12 volts. We made a new larger shelf to support the larger batteries and battery boxes. While installing the batteries we noticed the engine room light was not working. We found it was missing a bulb so we purchased and installed a new one - and you have a spare.
Update March 7th 2010
Corresponds to week one billing
Corresponds to week 2 billing
Install electronics in drawer under steering wheel
Install new light, bilge blower, and horn switches
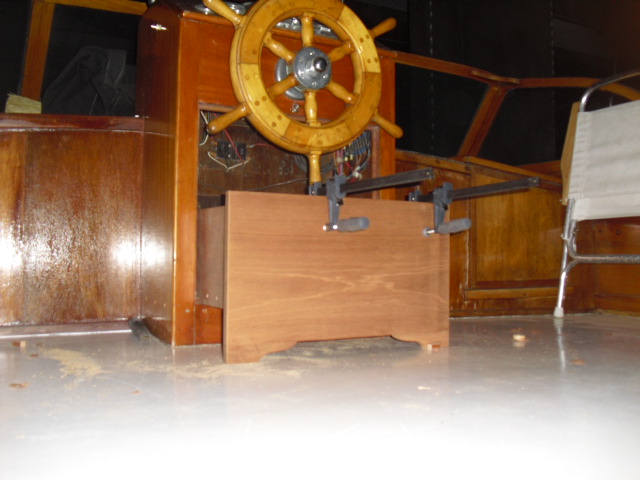
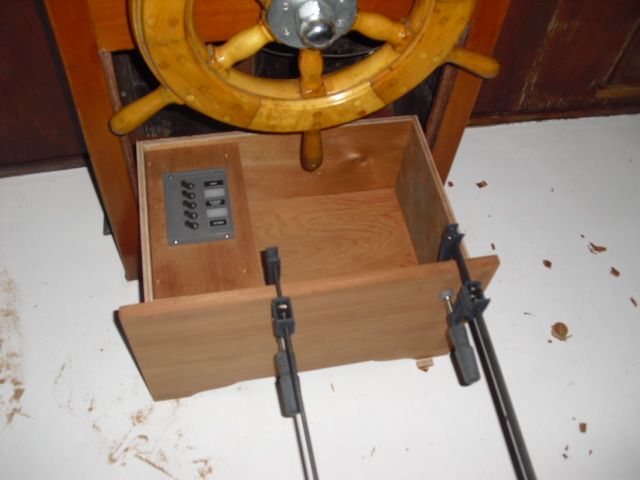
There is obviously still some work to be completed on this, but the drawer is complete.
Still to complete is the panel above the drawer and below the steering wheel. I will be cutting down the original panel for use here.
It catches / latches in both the closed and open positions so once it is position it will stay there in rough water.
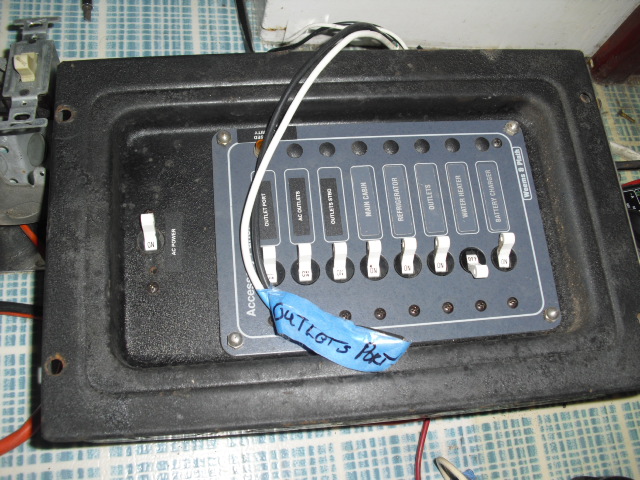
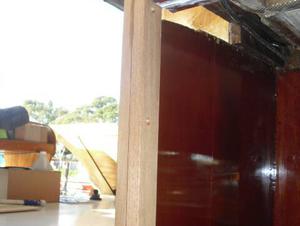
The original breaker panel was installed on the bulkhead behind a closed panel. If the owner wanted to turn anything on or off he had to remove the panel first.
We have moved the panel out into a drawer. This gives him better access to the breakers. We are also adding external switches on the helm station so that turning on an off Nav and anchor lights, and blowers etc won't require opening of the drawer.
The area on the right hand side of the drawer is for storage of electronics such as GPS, Hand Held communicators and Hand held ship to shore. There is also an area large enough to install a depth sounder under the breaker panels.
While preparing to move the panel we found two circuits attached to the buss bar which is powered by a #6 wire rated for and protected by a 50 amp breaker. The two wires attached to the buss bar were rated at 15 amps and 20 amps respectively. One went to a light in the master state room and the other went to the 12 volt power for the fridge! We consolidated a few lighting loads that are going to be isolated by the switches at the helm and made "room" for these circuits to be protected by breakers!
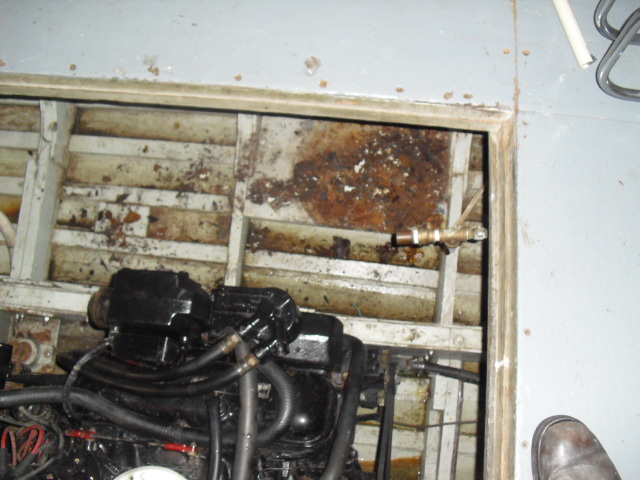
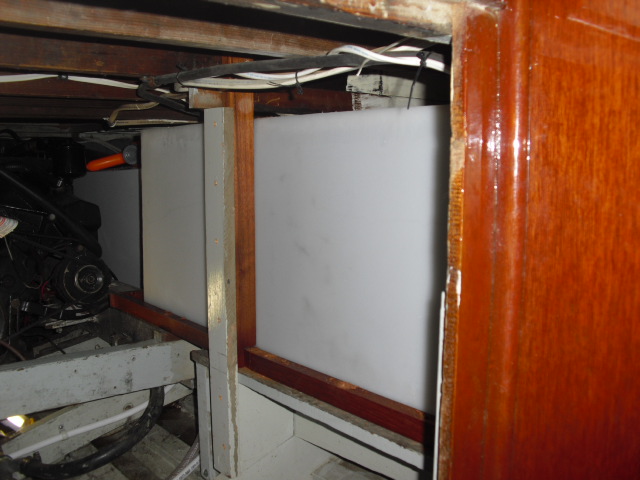
Removal of Water Tank in preparation for replacement tank
So as not to leave metal shavings in the bilge we purchased a air powered sheet metal shear that we used to go in and cut the tank up to where it could be folded up and removed through the steps in the galley that access the engine room. The photo is the location where the water tank was. When we cut into the tank it was completely empty. We examined the soldered seams of the tank after we had it out and we found the damaged area in a bottom seam on the end that would have been to the right of the picture. The new tank made of plastic should arrive on Monday 3/8/2010 and be installed Tuesday. I am anxious to have water on the boat!
Update 3rd Week 2010
Outdoor Shower
First question. Do you wish to retain your old shower system? (back side seen here)
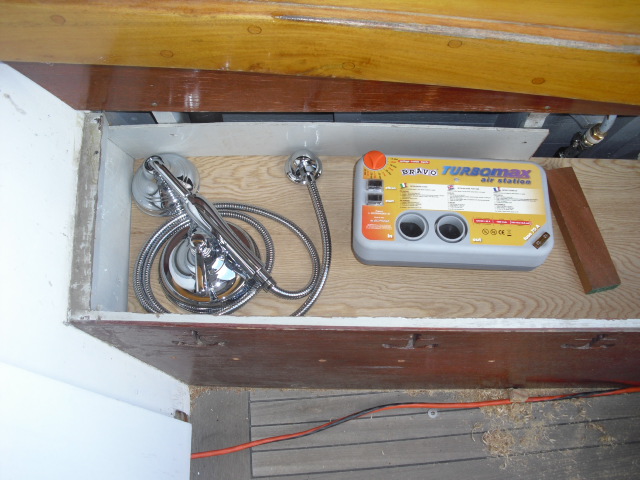
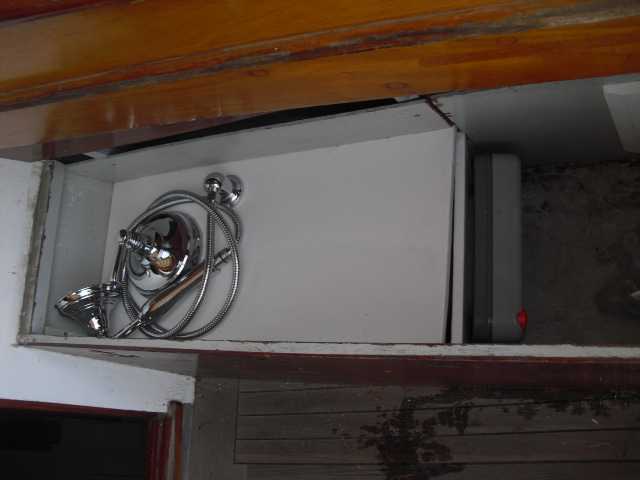
Here is the storage area for the shower control and the shower head.
Current plan is to mount the shower control knob (1) and the shower head supply fitting (2) about where they are. Then after mounting is determined cover the marine plywood with vinyl. White or forest green or the sea foam green for example. Please specify target color if you would like to.
Note the Scoprego blower unit placed beside it. I don't like it there, however, the wire to run this thing is expensive and I don't want to put it any further away from the batteries than it is.
I'm thinking the area where the blower is could be where the shower curtain and soap and such is stored and the blower unit could be mounted below this panel facing aft. It is a tight fit there but I' i'm pretty sure we can get it there.
If the blowers location is not an issue for you let me know and I'll just center it in this panel about where you see it.
1
2
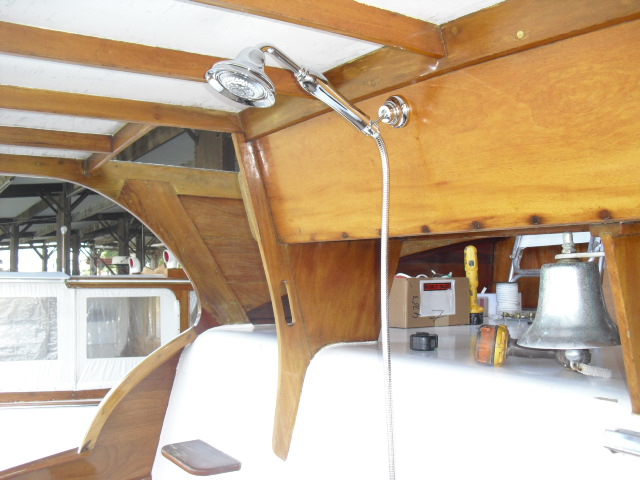
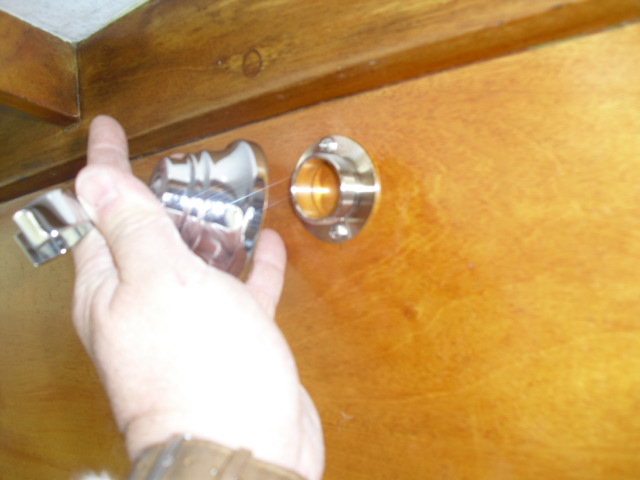
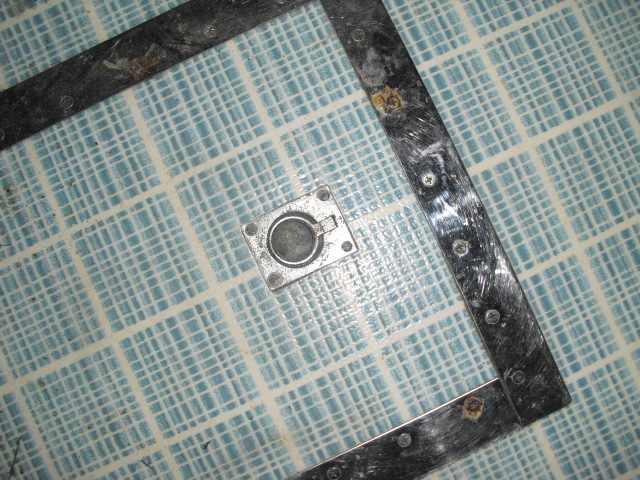
I gave up on the idea of hiding the hand wand behind the seat. I would have had to move the seat cushions forward and make the seat deeper as I'd be taking about 5" at the back causing me to have to move the seat back forward. I've gone back to your plan "A" with the concept of removing the mount when not on the boat or leaving. In the right hand picture you will see that it removes easily (I was wrong earlier when I said it would not be easy to remove) . It does leave a threaded ring that is attached with two pan head screws. I think the best way to hide this would be for me to make a wooden disk that will screw in place over the fitting. Greg is looking for something also that could cover this. Perhaps you have a piece of Nautical art in mind.
Note the arrow on the block of wood. The "shelf would end at that block creating a pocket to the right of the shelf (where the old shower head is) to store the inflator hose.
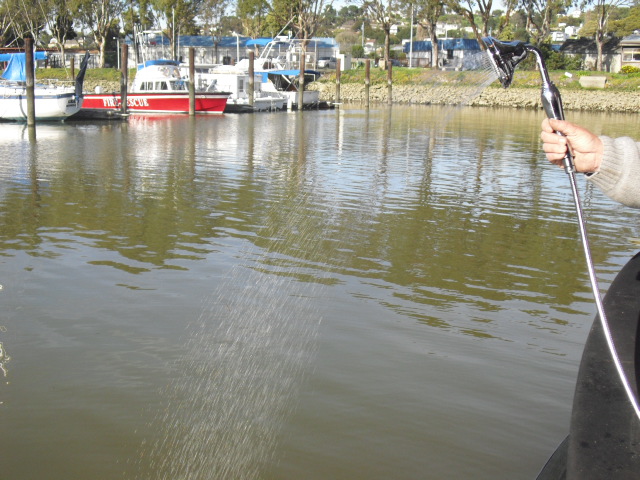
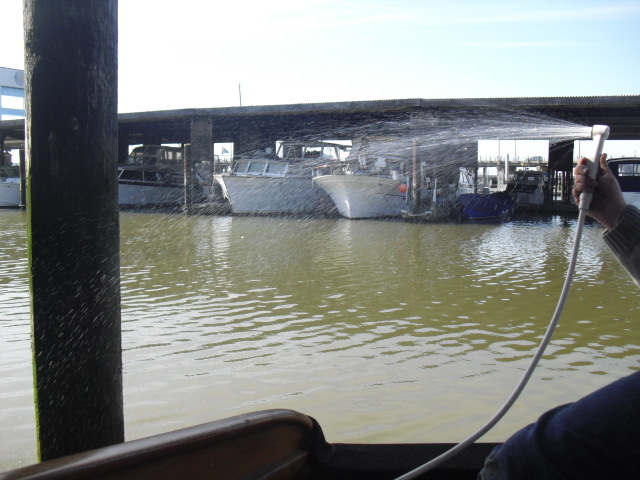
The showers (both the old one used at the swim platform for rinse off and the new one that will be used for showers are installed on the aft deck.
In the picture directly above the Scoprego inflator is just barely visible. The manufacturer claims it is capable of inflating an inflatable in as little as 7-1/2 minutes!
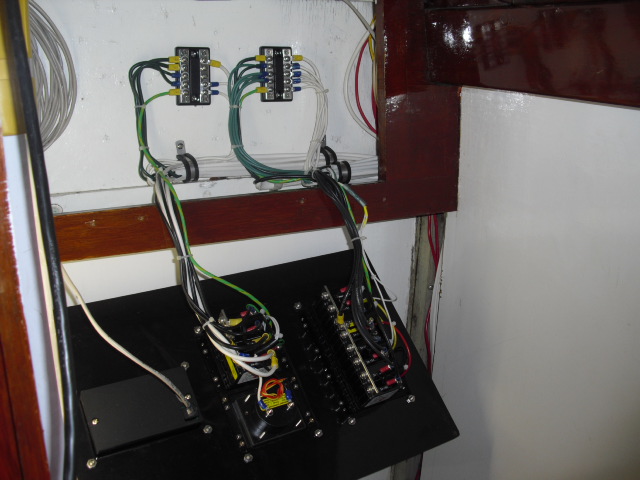

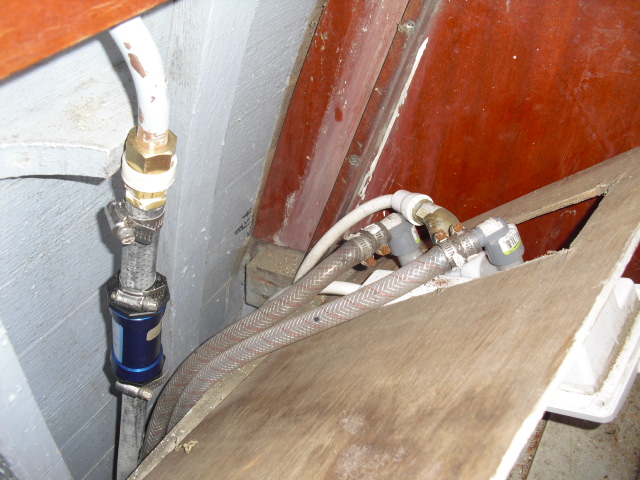
The old panel is pictured above. It had been a household panel at one time that was modified with a marine panel at some point in the boats history. When we opened the panel we said RATS! the wiring was substandard coming into the panel also. Some wiring appeared to be a cut off cord from a power tool! About a number 16 or 18 AWG wire landed on a 15 amp breaker! The smallest wire that should be landed on a 15 amp breaker is a # 14 AWG (American wire gauge). In the picture above right shows how even 12 volt wiring to the domestic water pump was wrapped around plumbing and 120 volt wiring. We straightened all that out while in there.
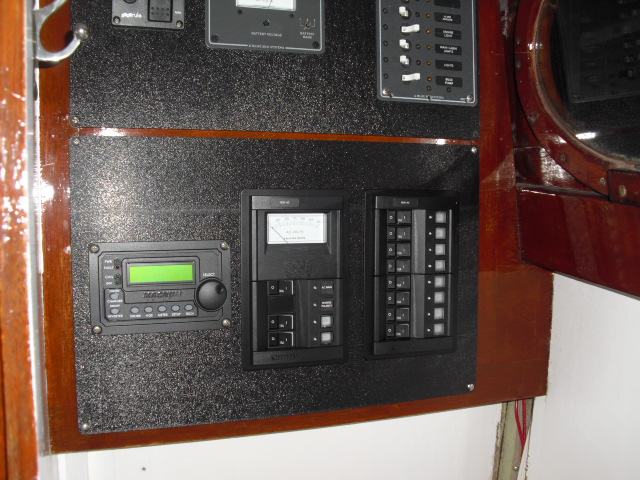
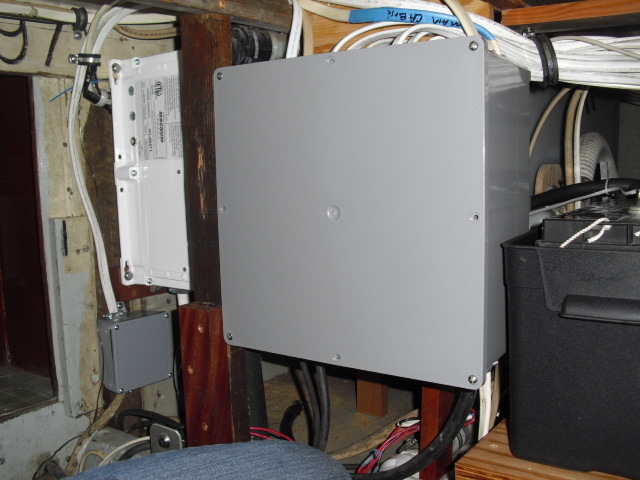
The new panels from behind showing the neatness and organization of the wiring and the face of the panels. The left panel is the inverter remote supervisory panel, the center panel is the shore power panel and the right hand panel is the inverter panel. When on shore power the inverter passes power through to the right hand panel. When off shore power the only active panels will be the remote control panel on the left and the inverter panel on the right.
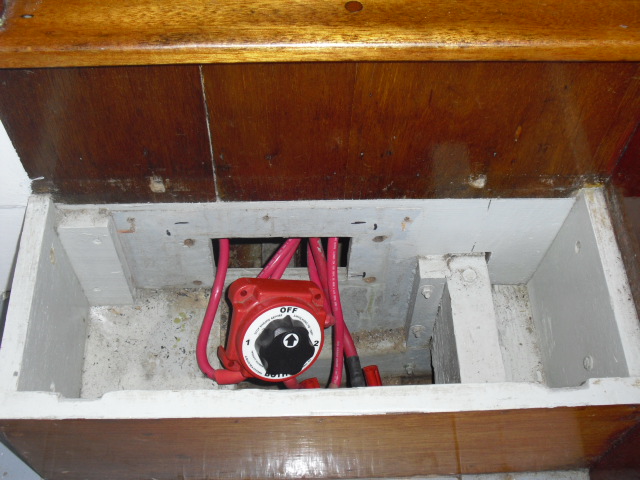
A new panel was made for the battery switches. The left switch is the inverter 12 volt power, the center switch is for the engine batteries. One battery, or the other or both can be selected for reliable engine starting. The right hand switch is for the house battery bank. These will be labeled before the end of the project.
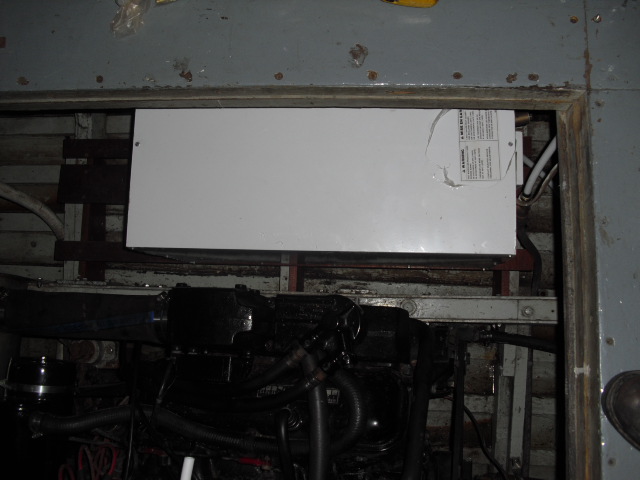
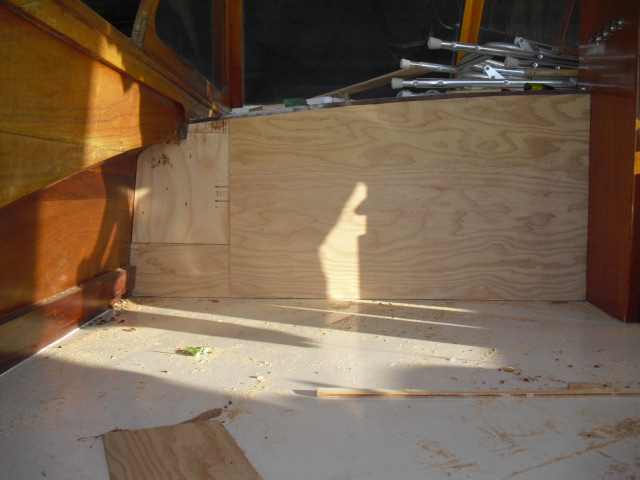
The new water tank was installed and the tank support frame modified to keep the new tank from moving in rough water. The back side of the frame had to be modified too and so a floor panel had to be removed to do it.... nothing is ever THAT simple.... a wall panel had to be removed in order to remove the floor panel!
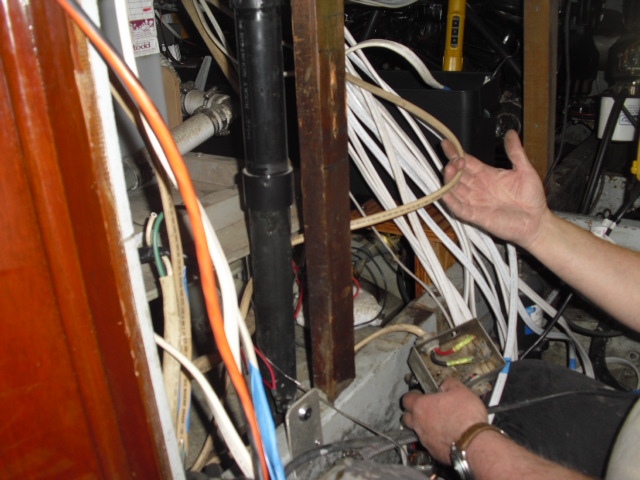
The two pictures above show the before... the old panel and the maze of wiring. The picture to the right shows the junction box that in combination with the new electrical panels installed (shown in last weeks updates) cleans up and gets ignition sources out of the engine room.
Update 4th Week 2010
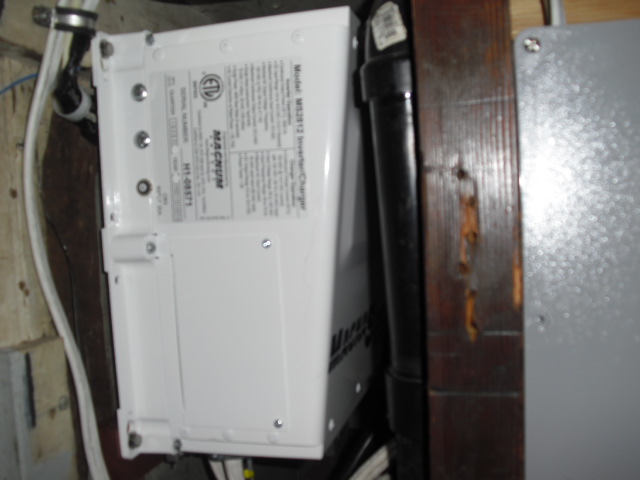
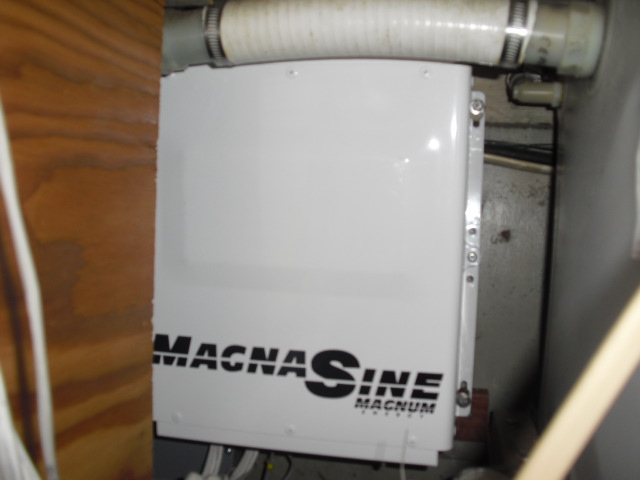
The pictures below show the inverter and inverter battery installation. The inverter has been started up to the point that it is passing shore power to the inverter panel. This week we will connect the batteries to the inverter and go through the manufacturers start up check list to commission the inverter and check for operation.
Inverter Installation
Electrical Panel Replacement (continued from last week)
Fly Bridge Varnish - preparation / woodwork

The bridge has 3 different types of grain and color of wood panels in it so we are overlaying it with a ribbon stripe mahogany panel laminated to the existing structural plywood to make it all the same. It will match the wood in the interior of the boat closely in grain. The final color will be Chris Craft Mahogany stain and coated with 9 coats of varnish.
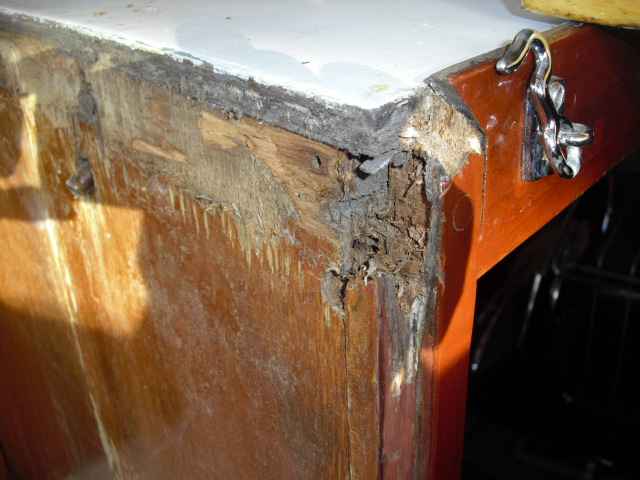
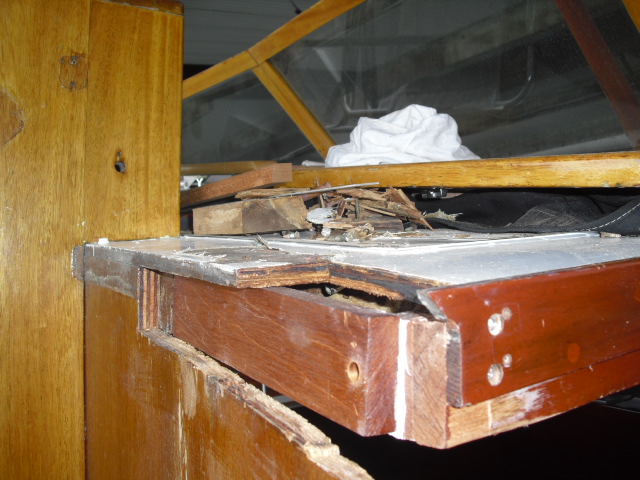
The bad news, when we pulled the trim off the panels we found rot over by the door to the salon. It is not major... but needs to come out before it becomes major.
It also commits us to headliner work as we have to pull it down to get to some of the rotted area.
Good News It will put some pressure on the budget for this area.. but may possibly fit within the budget for this line item.
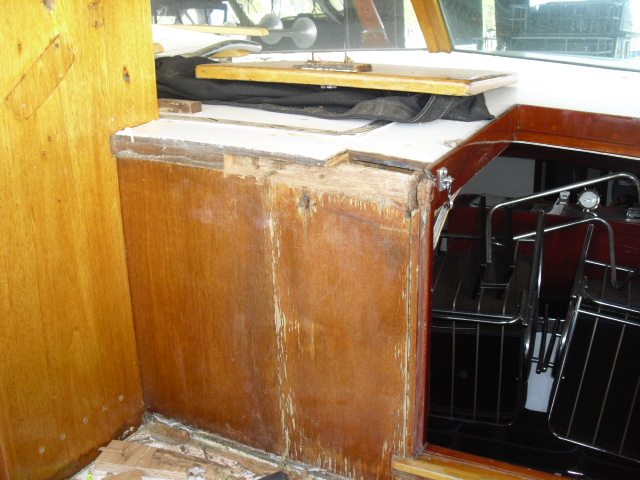
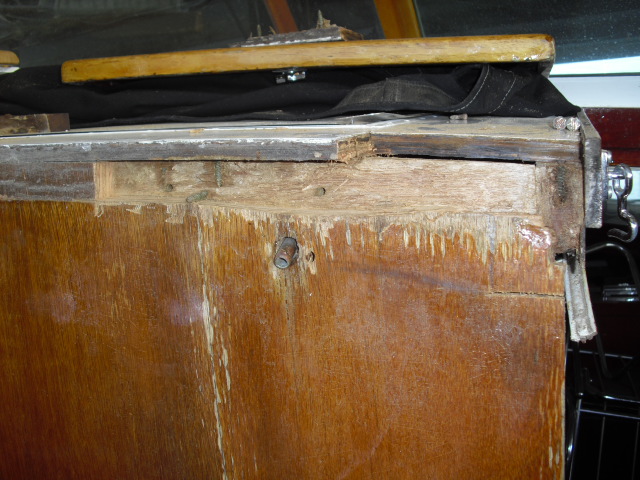
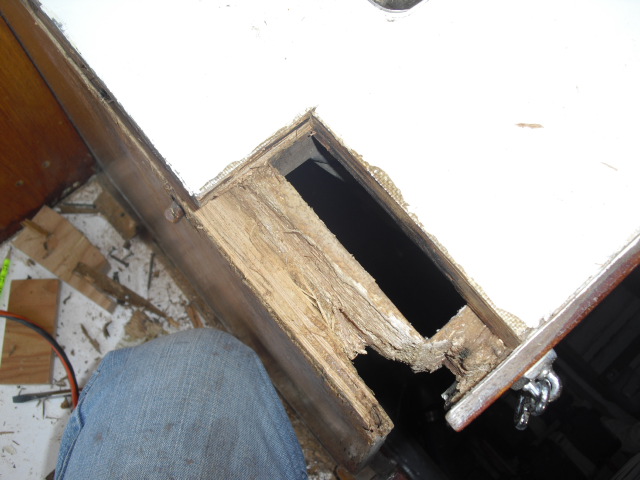

The pictures above show the extent of the rot - again not real major.
The picture to the left shows the PATTERN wood ready to be transferred to the ribbon stripe ply that will be laminated to the structural plywood of the bulkhead.
Directly above - the new trim pieces that were manufactured in our mobile shop pictured below.
Headliner
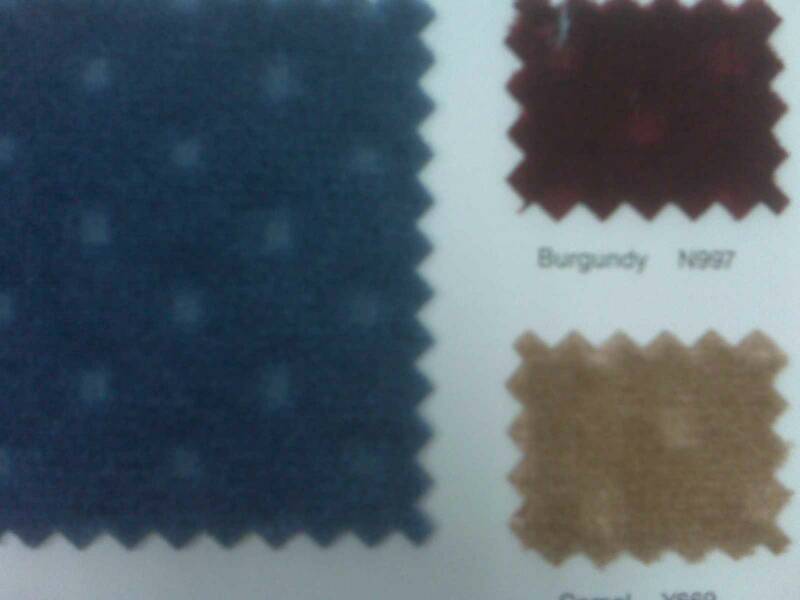
One of our upholstery suppliers is sending me samples of headliner fabric that is a plain velvet, but there are some other options available to consider too. Rippled (right) and a textured one to the left. Today (Tuesday) we also have a automotive trim shop owner coming at 5:00 pm to look at the job and give us a price for the labor. We had to sweet talk him in to coming down and actually meet him at his shop and either carry him down there or let him follow us. He told Taylor he " never leaves his shop to work" and he "have to bring his air compressor down and couldn't do that. Taylor told him he could use our compressor and again "sweet talked" him in to coming down to at least look at the job. We should know how it will fit our labor budget on the project later this evening!
Update 5th Week 2010
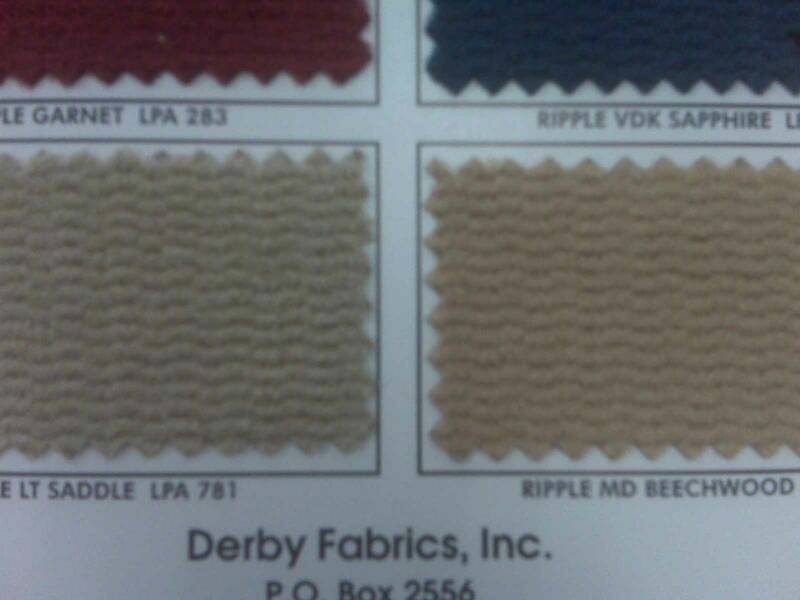
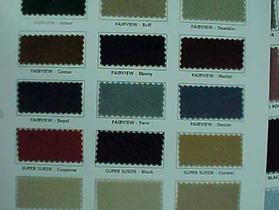
The Upholstery labor bid was a bust.... the folks really didn't want to leave their shop to do work, and it was priced as such. Also the estimates of what the headliner was going to cost from state room to salon were inconsistent. Our finish man, Jason has installed headliner before, and I got trained by the local upholster today. I am going to get one more training session from my Brother in Law, Manford Bloyd of Fun time Houseboats. We will be doing the headliner in the salon ourselves. We have additional samples pictured below that should also be getting to the owners office in California about right now!
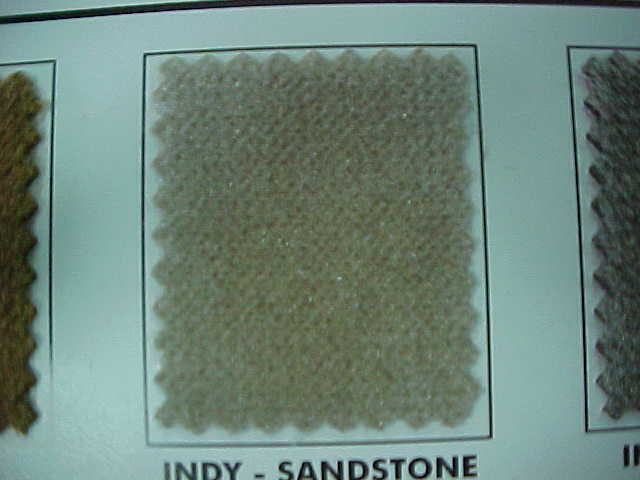
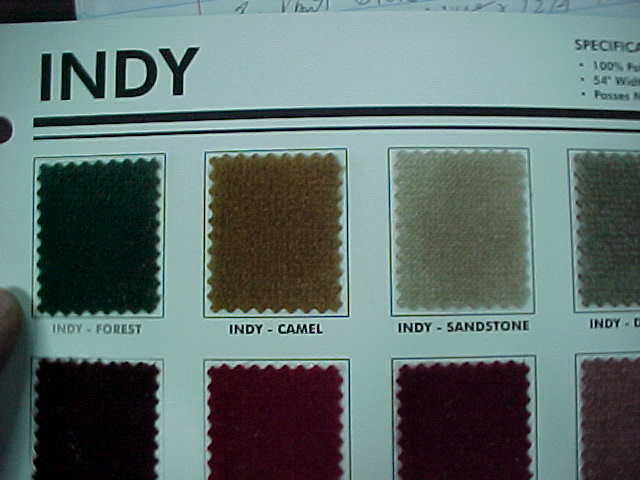
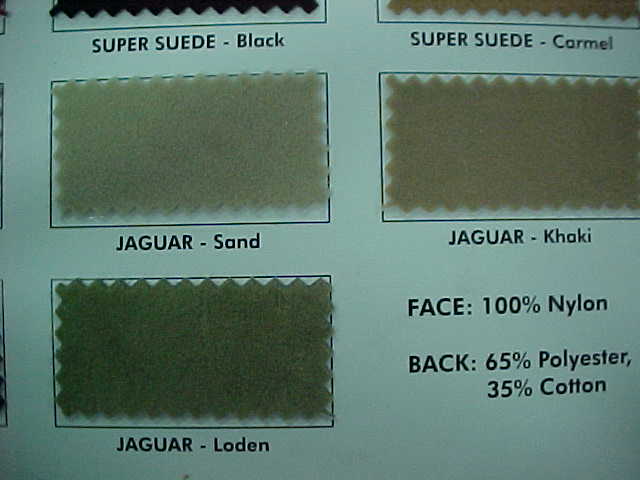
The Indy (above) is a bit course I think but the microfibers to the right seem to be about the right texture if I understand the customer properly. I think the Jaguar Sand meets our needs. I was uncomfortable ordering the existing headliner removed when we had not yet selected the fabric nor gotten a headliner installation quote we could live with. Installation is now not an issue.... we just need to select the material. If this is not the right material just let me know what we need to do , color, texture etc and we will make another run at it for when you come back. Since I won't be out for a couple of more weeks we don't have to take the first option - we have time to get exactly what you want.
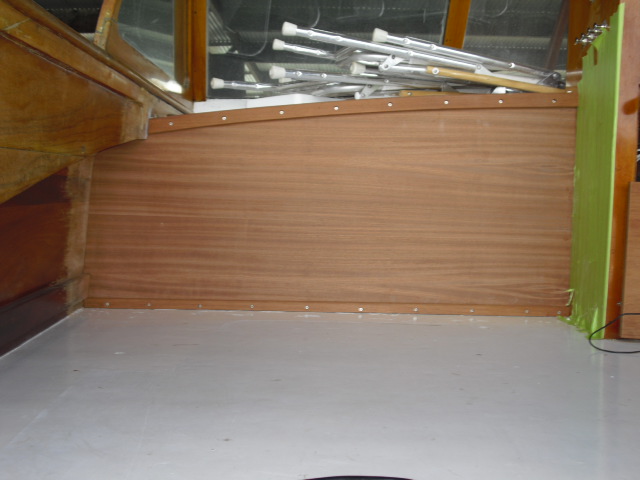
Fly Bridge Varnish - preparation / woodwork Continued
The Cockpit woodwork at the bulkhead is almost complete. We still have some holes to bung where switches and radios had been removed before the boat was purchased by its present owner, and we have some repair work to do on the bench seat at behind the helm as well.
The left hand pics are the before pics and to the right the in process not quite after pics.
Cap Rail Varnish - preparation / woodwork

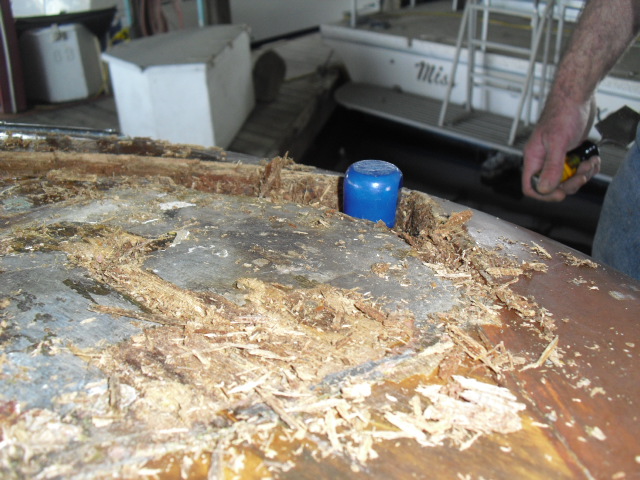

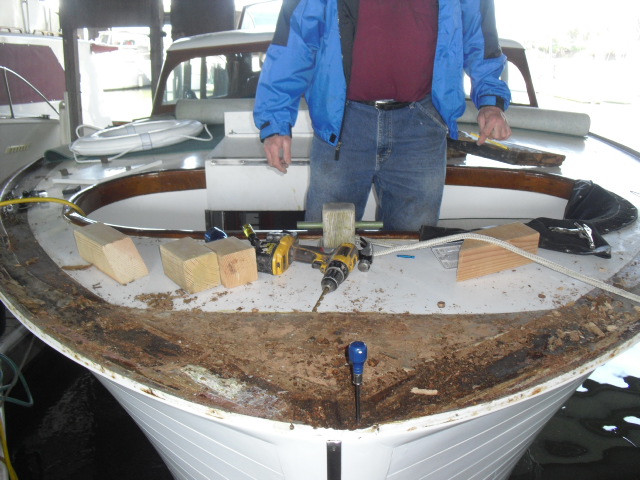
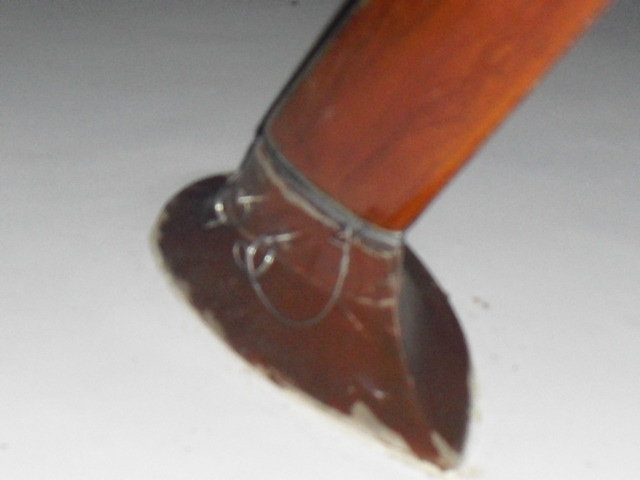
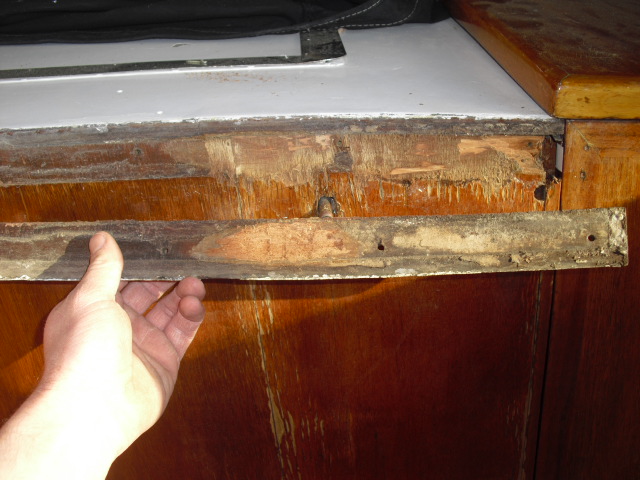
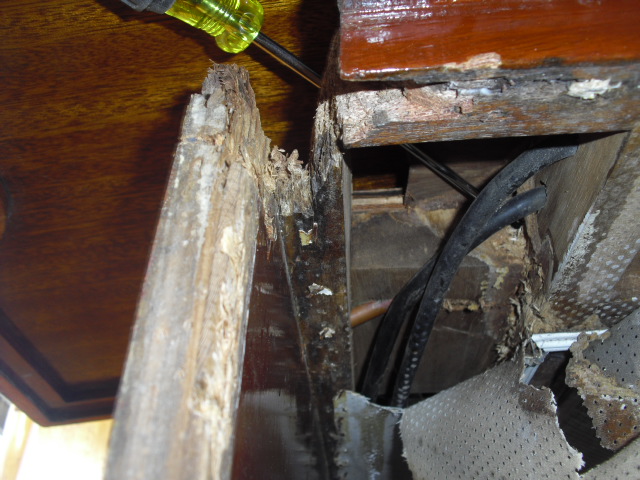
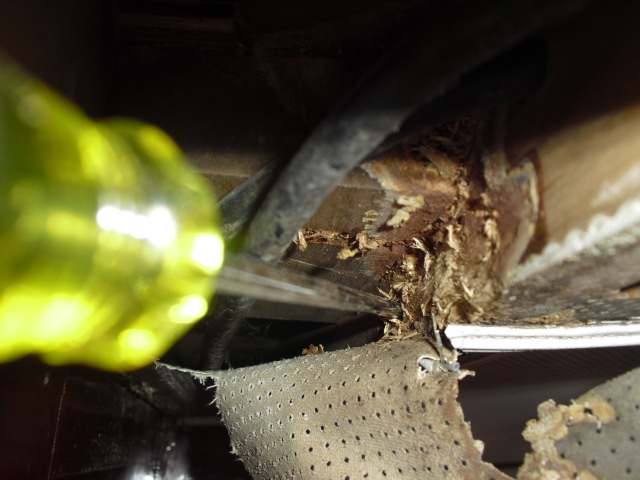
The first order of business was to dig out what appeared to be surface rot and make a Dutchman to replace the wood removed. However, it didn't work out quite so simple.... here are comments from the front where the battle is being fought.
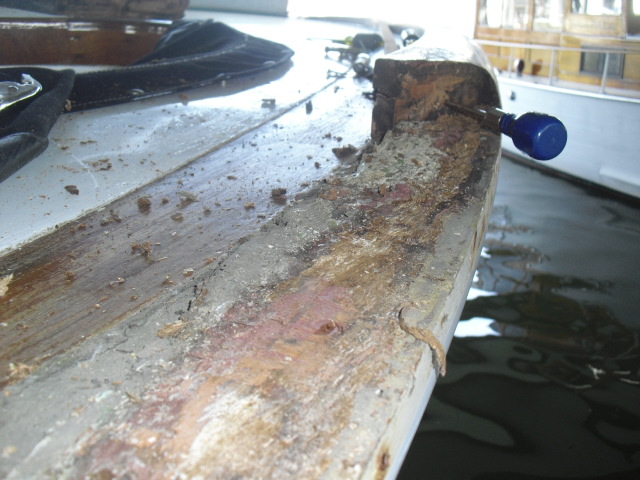
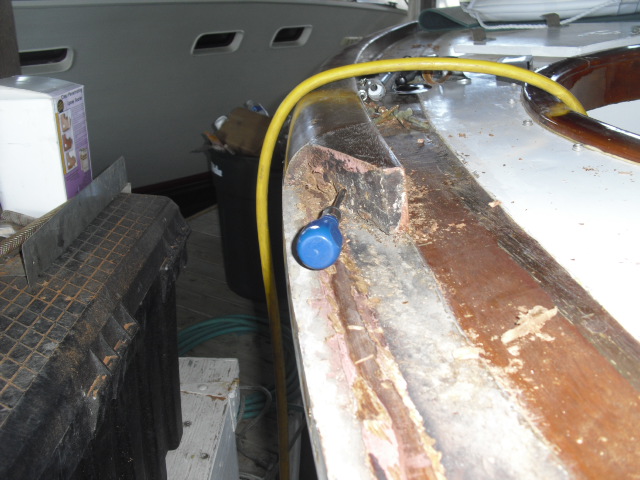
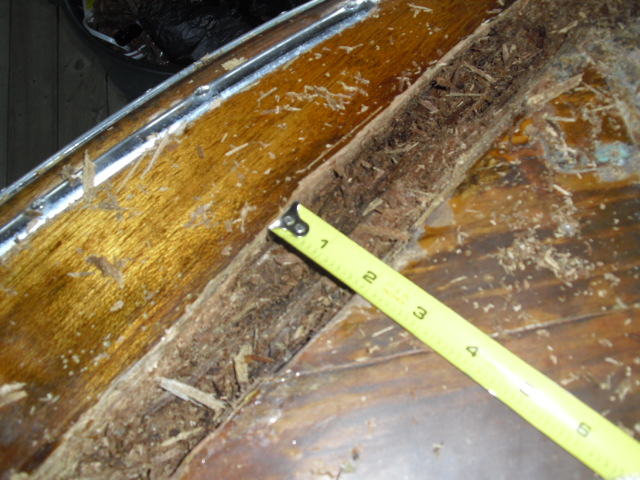
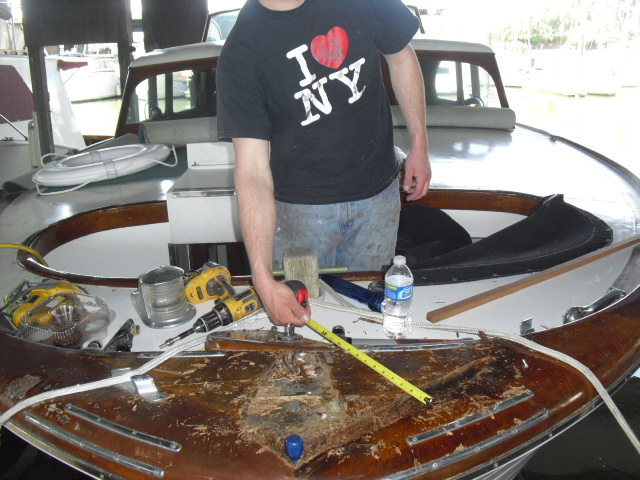
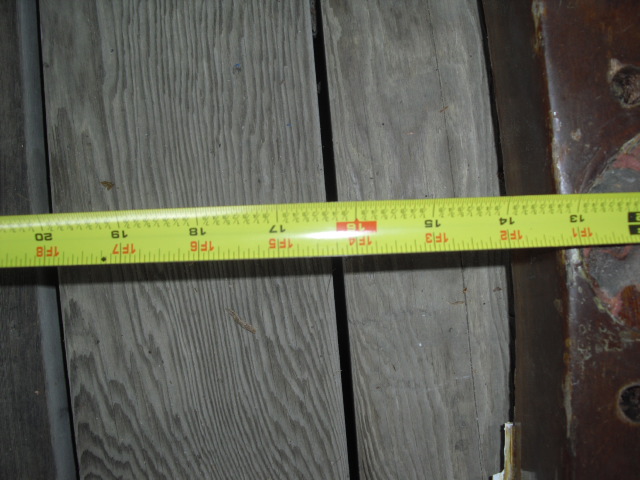
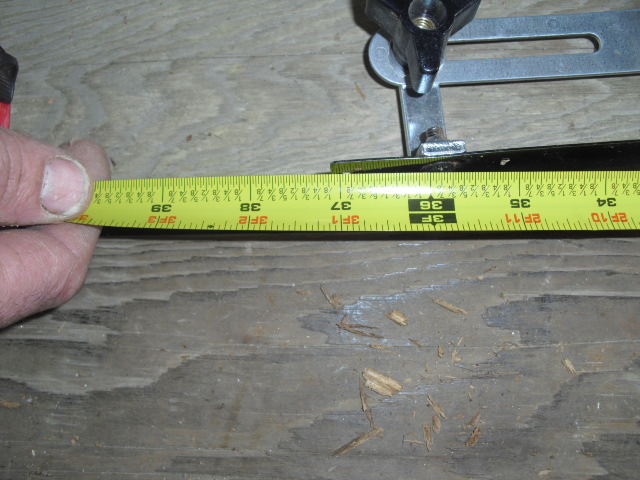
"The Channel of rot is about 2in wide at the top but gets somewhere from a half in to an inch wider at the bottom. In the front of the nose where the blue handled awl is, well... the handle bottomed out and was already 7in deep. In one of the photos I measured the length of the awl. The rot could be in the stem but depending on how wide, it could be an easy fix. Hopefully I can core it and plug it all the way through the deck and seal it in with 5200 (52,000,000). I would replace the port side cap rail, center between the cap rails, and the starboard side cap rail cause it will possibly fall apart as it is taken off. "
So, to get to the rot in the end grain of the stem the cap rails had to come off.
The investigation of how much damage do we have is this:
- The Port Cap rail is badly enough damaged that it will be easier to do a complete replacement than Dutchman.
- The wood between cap rails that fills the triangle is also badly damaged.
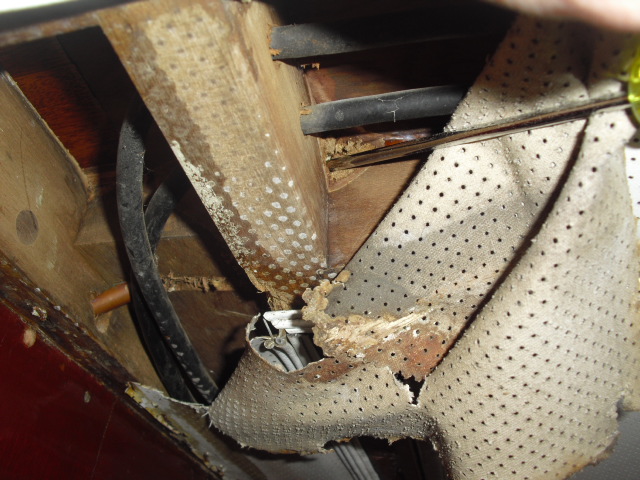
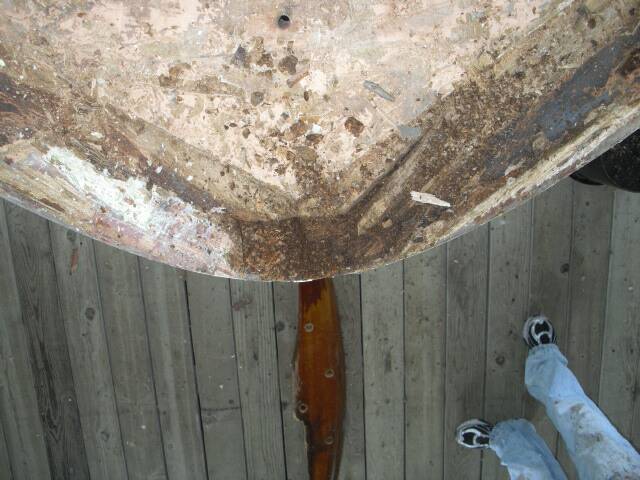
- Water was trapped between the cap rails and the shelf (see diagram below) and the cap rails rotted from the bottom up and the sheer shelf rotted from the seam down. BUT NOT ALL THE WAY THROUGH. In fact there is still about 1" or more of good wood thickness. Which is also why it wasn't seen from below.
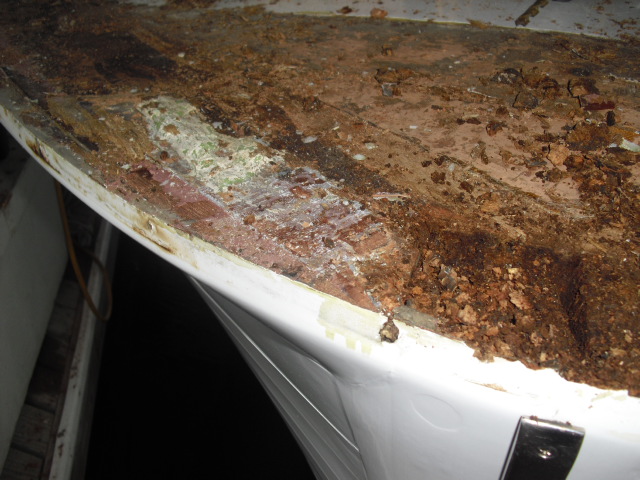
At this point to do an effective repair that will outlive the varnish work we had to remove the cap rails and the filler between them that completes the triangle at the bow of the boat. As of 3/24 end of day all the tear out was complete. During the day 3/25 the battle crew has cut rot out of top of the stem and out of the sheer shelf. At home base we found a wood supplier in San Fran that wanted a reasonable price for the Genuine Mahogany we need. We managed to save over $350 vs the supplier in Vallejo! We have to drive to San Fran... but we get to hand select our wood to match grain and color also.
The investigation of root cause results in this:
- The cap rails have been off before and rotted areas in the shelf and the underside of the cap rails were possibly scraped away and an epoxy product put in as a filler.
- When the cap rails were re-installed there was no bedding compound installed between the cap rails and the sheer shelf. Bedding compound is a mixture of linseed oil and inert solids that fill any voids between the wooden members and doesn't allow water to enter the space.
- Hence the water that was infiltrating and getting trapped kept the wood at the right moisture content for rot to flourish... never fear this is the process that takes out structural members in fiberglass (frozen snot) boats as well.
The fix is
- New bow section of cap rails applied over the sheer shelf that has had the rot removed (surgery), treatment with CPES (Chemo) and the wood replaced with wood epoxied and or 5200 (millioned) in place with fasteners used to clamp the assembly until the adhesives hold. The fasteners will not be removed but work in concert with the adhesives.
- We plan to pick up the wood in San Fran tomorrow morning just after the rush hour traffic clears and should have the cap rails roughed in by evening. We will be sending the wood for the triangular assembly from the shop in Ky as we are going to resaw the back side of the wood we send to match the contour of the crown in the deck of the boat.
- Total cost 3-4 days and 50 some odd board feet of Mahogany at $12.00 per board foot. Incremental cost - materials and 2-3 days labor.
Cap Rail - sometimes called toe rail
Stem
Shelf or Sheer shelf
Deck
Stem
Rot showing on back of cap rails
Clockwise from above
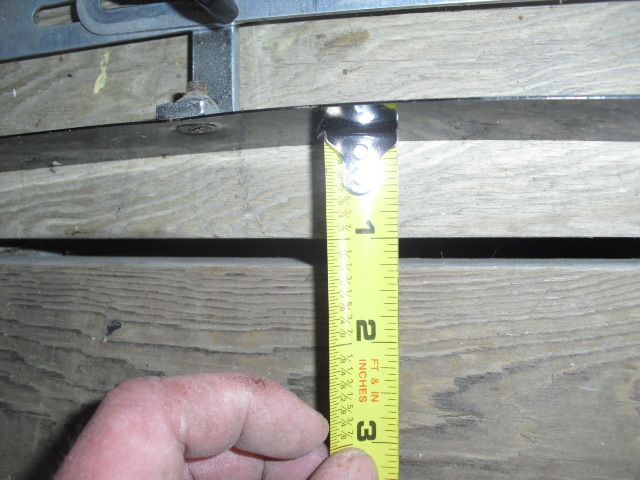
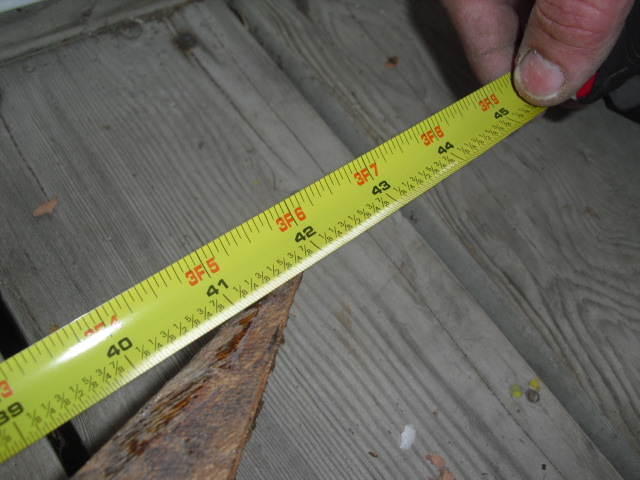
The triangular piece that fits between the cap rails at the bow is 42" tip to tip and will take 16"of stock wide (we will cut a curve in the base of the triangle). The curvature of the deck as measured with our contour gauge is 1" of curvature on a 36" gauge or 1.33" on 48" of stock.
We are sending Taylor's girlfriend out to clean inside and out and polish chrome.... we just need to cover her costs which should be MUCH lower than hiring the cleaning done at California rates OR using our skilled guys to do it! In return for the conjugal visit she will be cleaning for the better part of a week.
Cleaning and polishing
Credits
To the many people and organizations that have assisted with this project above and beyond the call of duty we owe a debt of gratitude. They are, in no particular order:
- Canvas and cushion work
 Todd Mehserle - Vallejo
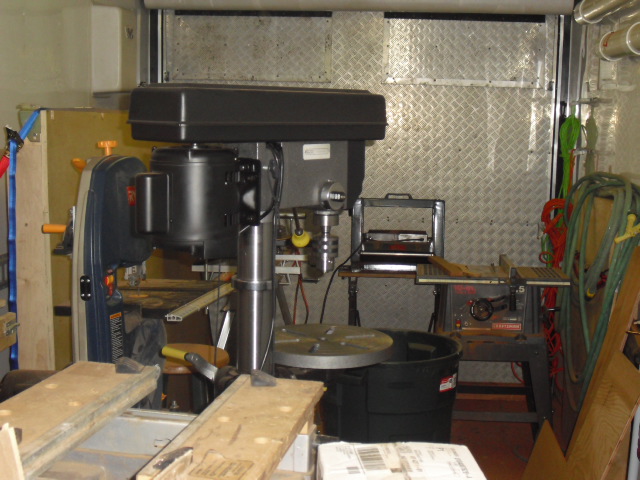
- Use of shop tools in remote location Chip Cash / North Bay Cabinets - Vallejo
- Receiving point for packages in Vallejo Chip Cash / North Bay Cabinets
- Quality Control Inspector Next door neighbor to boat - Jerry - Vallejo
- Machine Shop Work Ed - Vallejo
- Cheerleader, all around good guy, Occasional Home cooking Gordon - Vallejo
- Lubrication Coppola Winery - Napa California and Todd Mehserle / Vallejo Yacht Club
- Living Quarters and mobile shop Salyers Canvas and Boat Cleaning - Jamestown, KY
- Headliner installation training Custom Canvas and Fun Time Houseboats - Russell Springs, KY
Due to the unexpected rot we are having North Bay cabinets produce the new drawer for us to ensure we can keep the project on schedule.
Cockpit Drawer

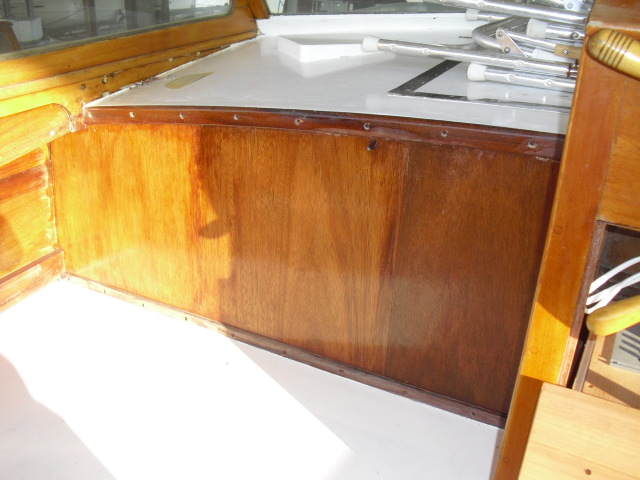
The bulkhead overlay - which was the intended project and the rot project which was unexpected are now completed. In the pictures below you can also see where many holes that once upon a time had antennas, radios and other switches have been bunged.